
I decided I want to see Rick and Morty in 4K, even though I can’t write neural networks. And, amazingly, I found a solution. You don’t even need to write any code: all you need is around 100GB of free space and a bit of patience. The result is a sharp 4K image that looks better than any interpolation.
Preparations
First, we need to understand that a technology for upscaling video using neural networks doesn’t exist. Or at least it’s not publicly available. And since that’s the case, we need to transform our video into a bunch of still frames!
Adobe Premiere Pro or any other video editing suite can do it, but, since it’s probably not installed on a lot of PCs, I used the console utility ffmpeg. Took the first episode of the first series and away I went:
$ ffmpeg -i RiM01x01_4K.mp4 -q:v 1 IM/01x01_%05d.jpgAround 10 minutes later, we get a huge folder filled with images. For me it took all of 26GB.
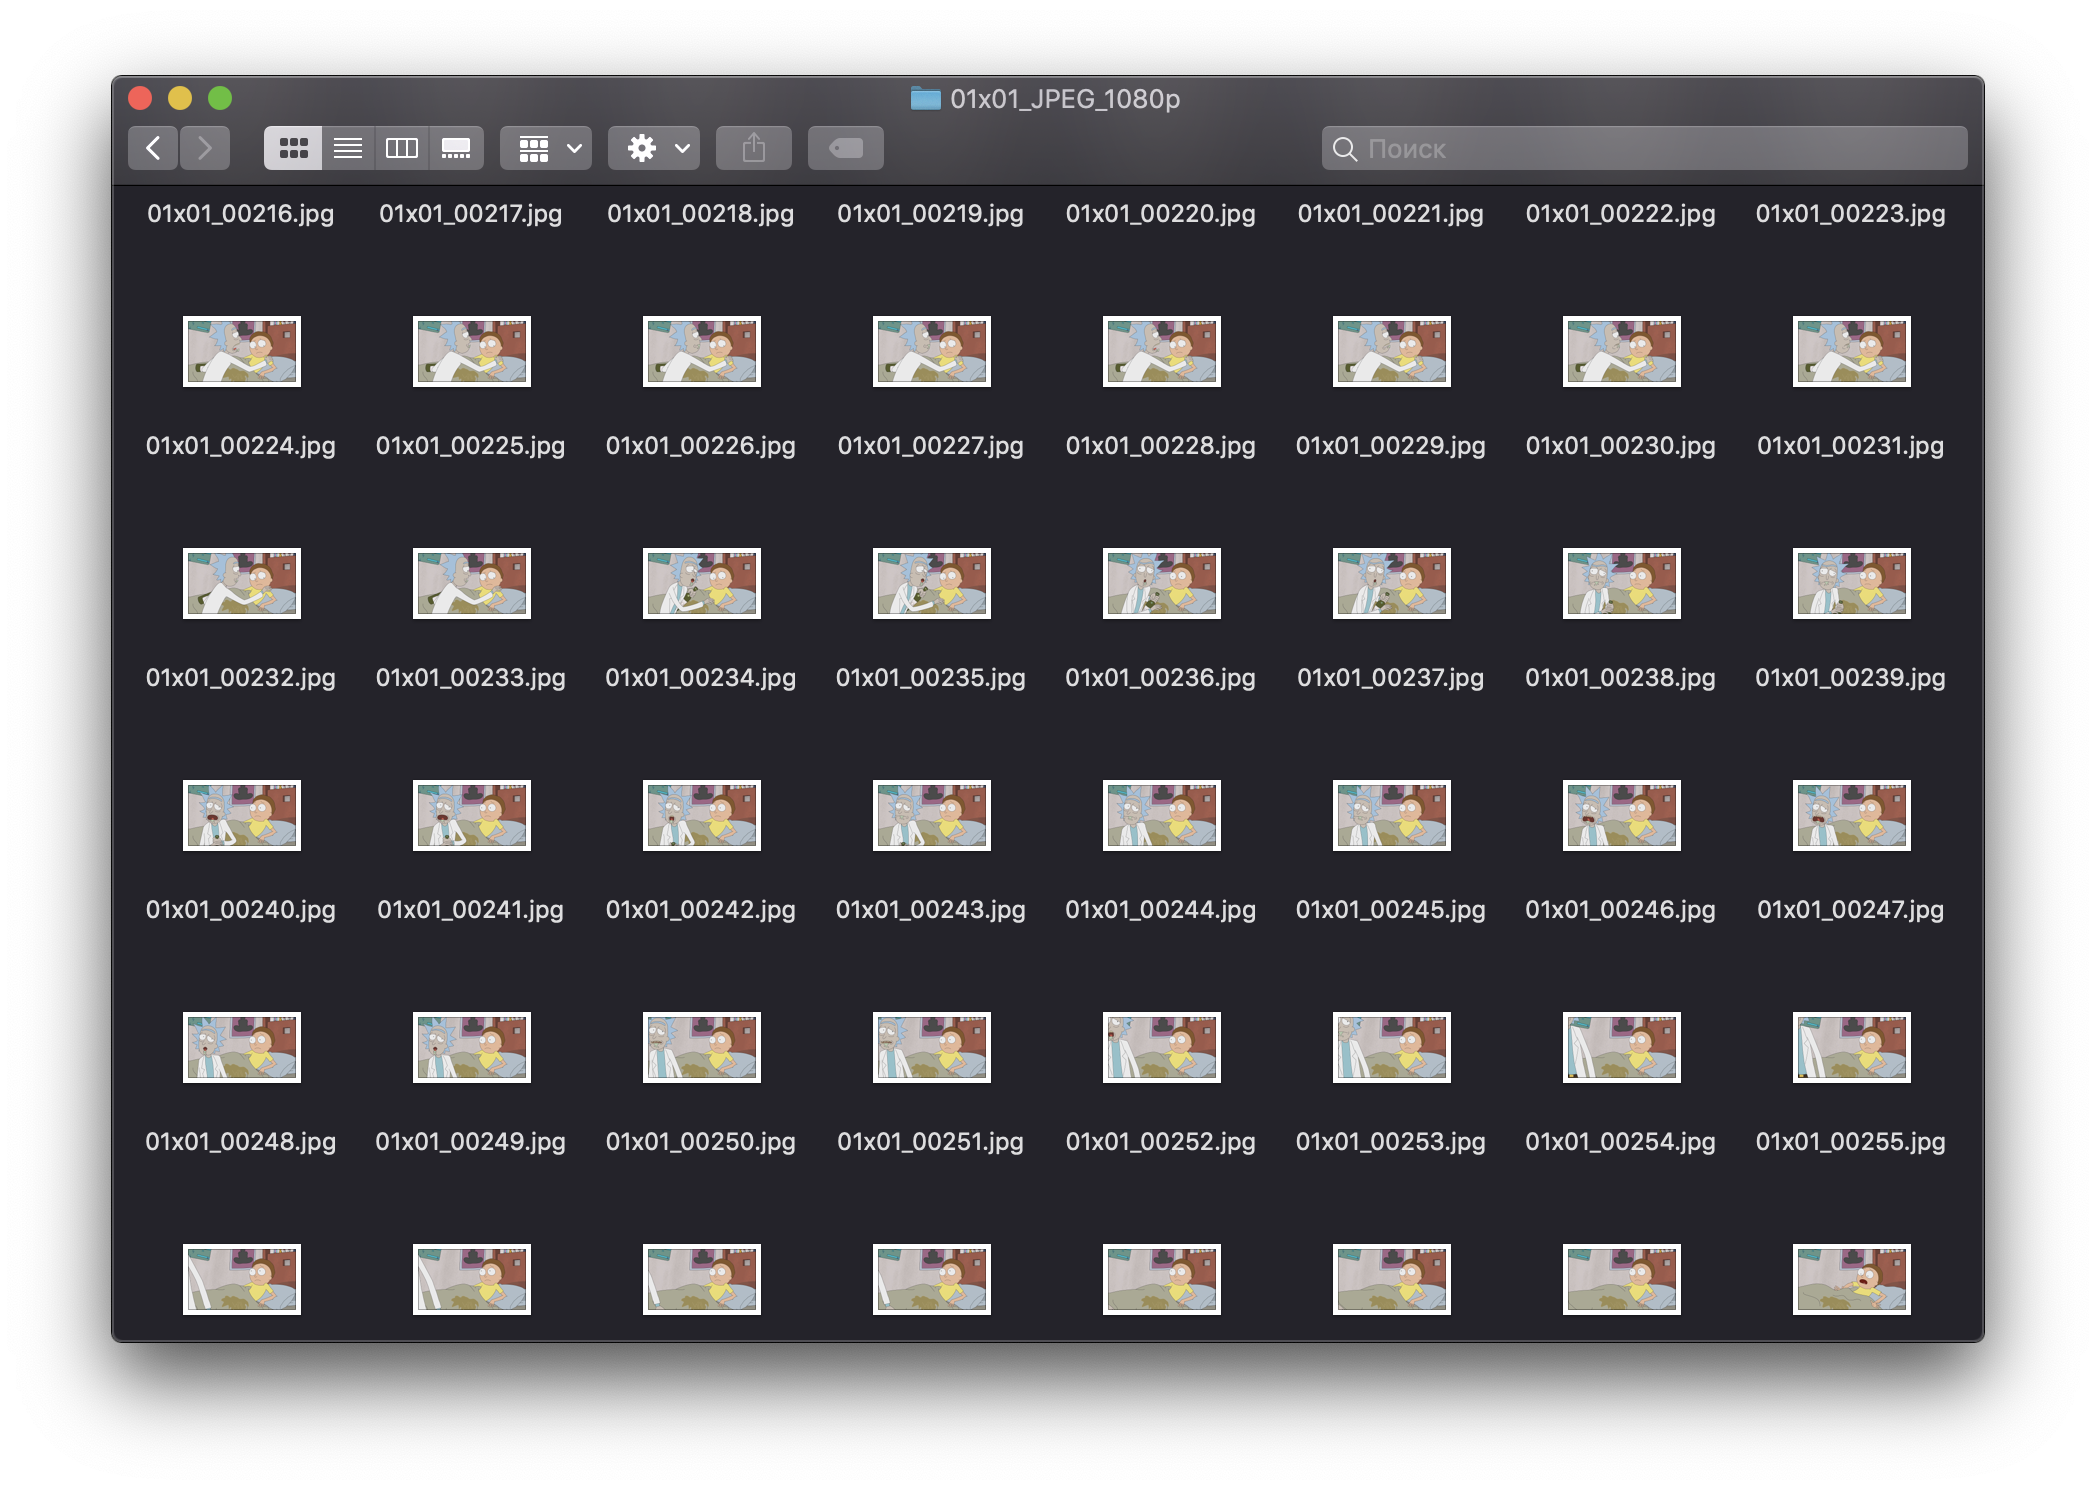
Now all we need is to process every single one of those!
How?
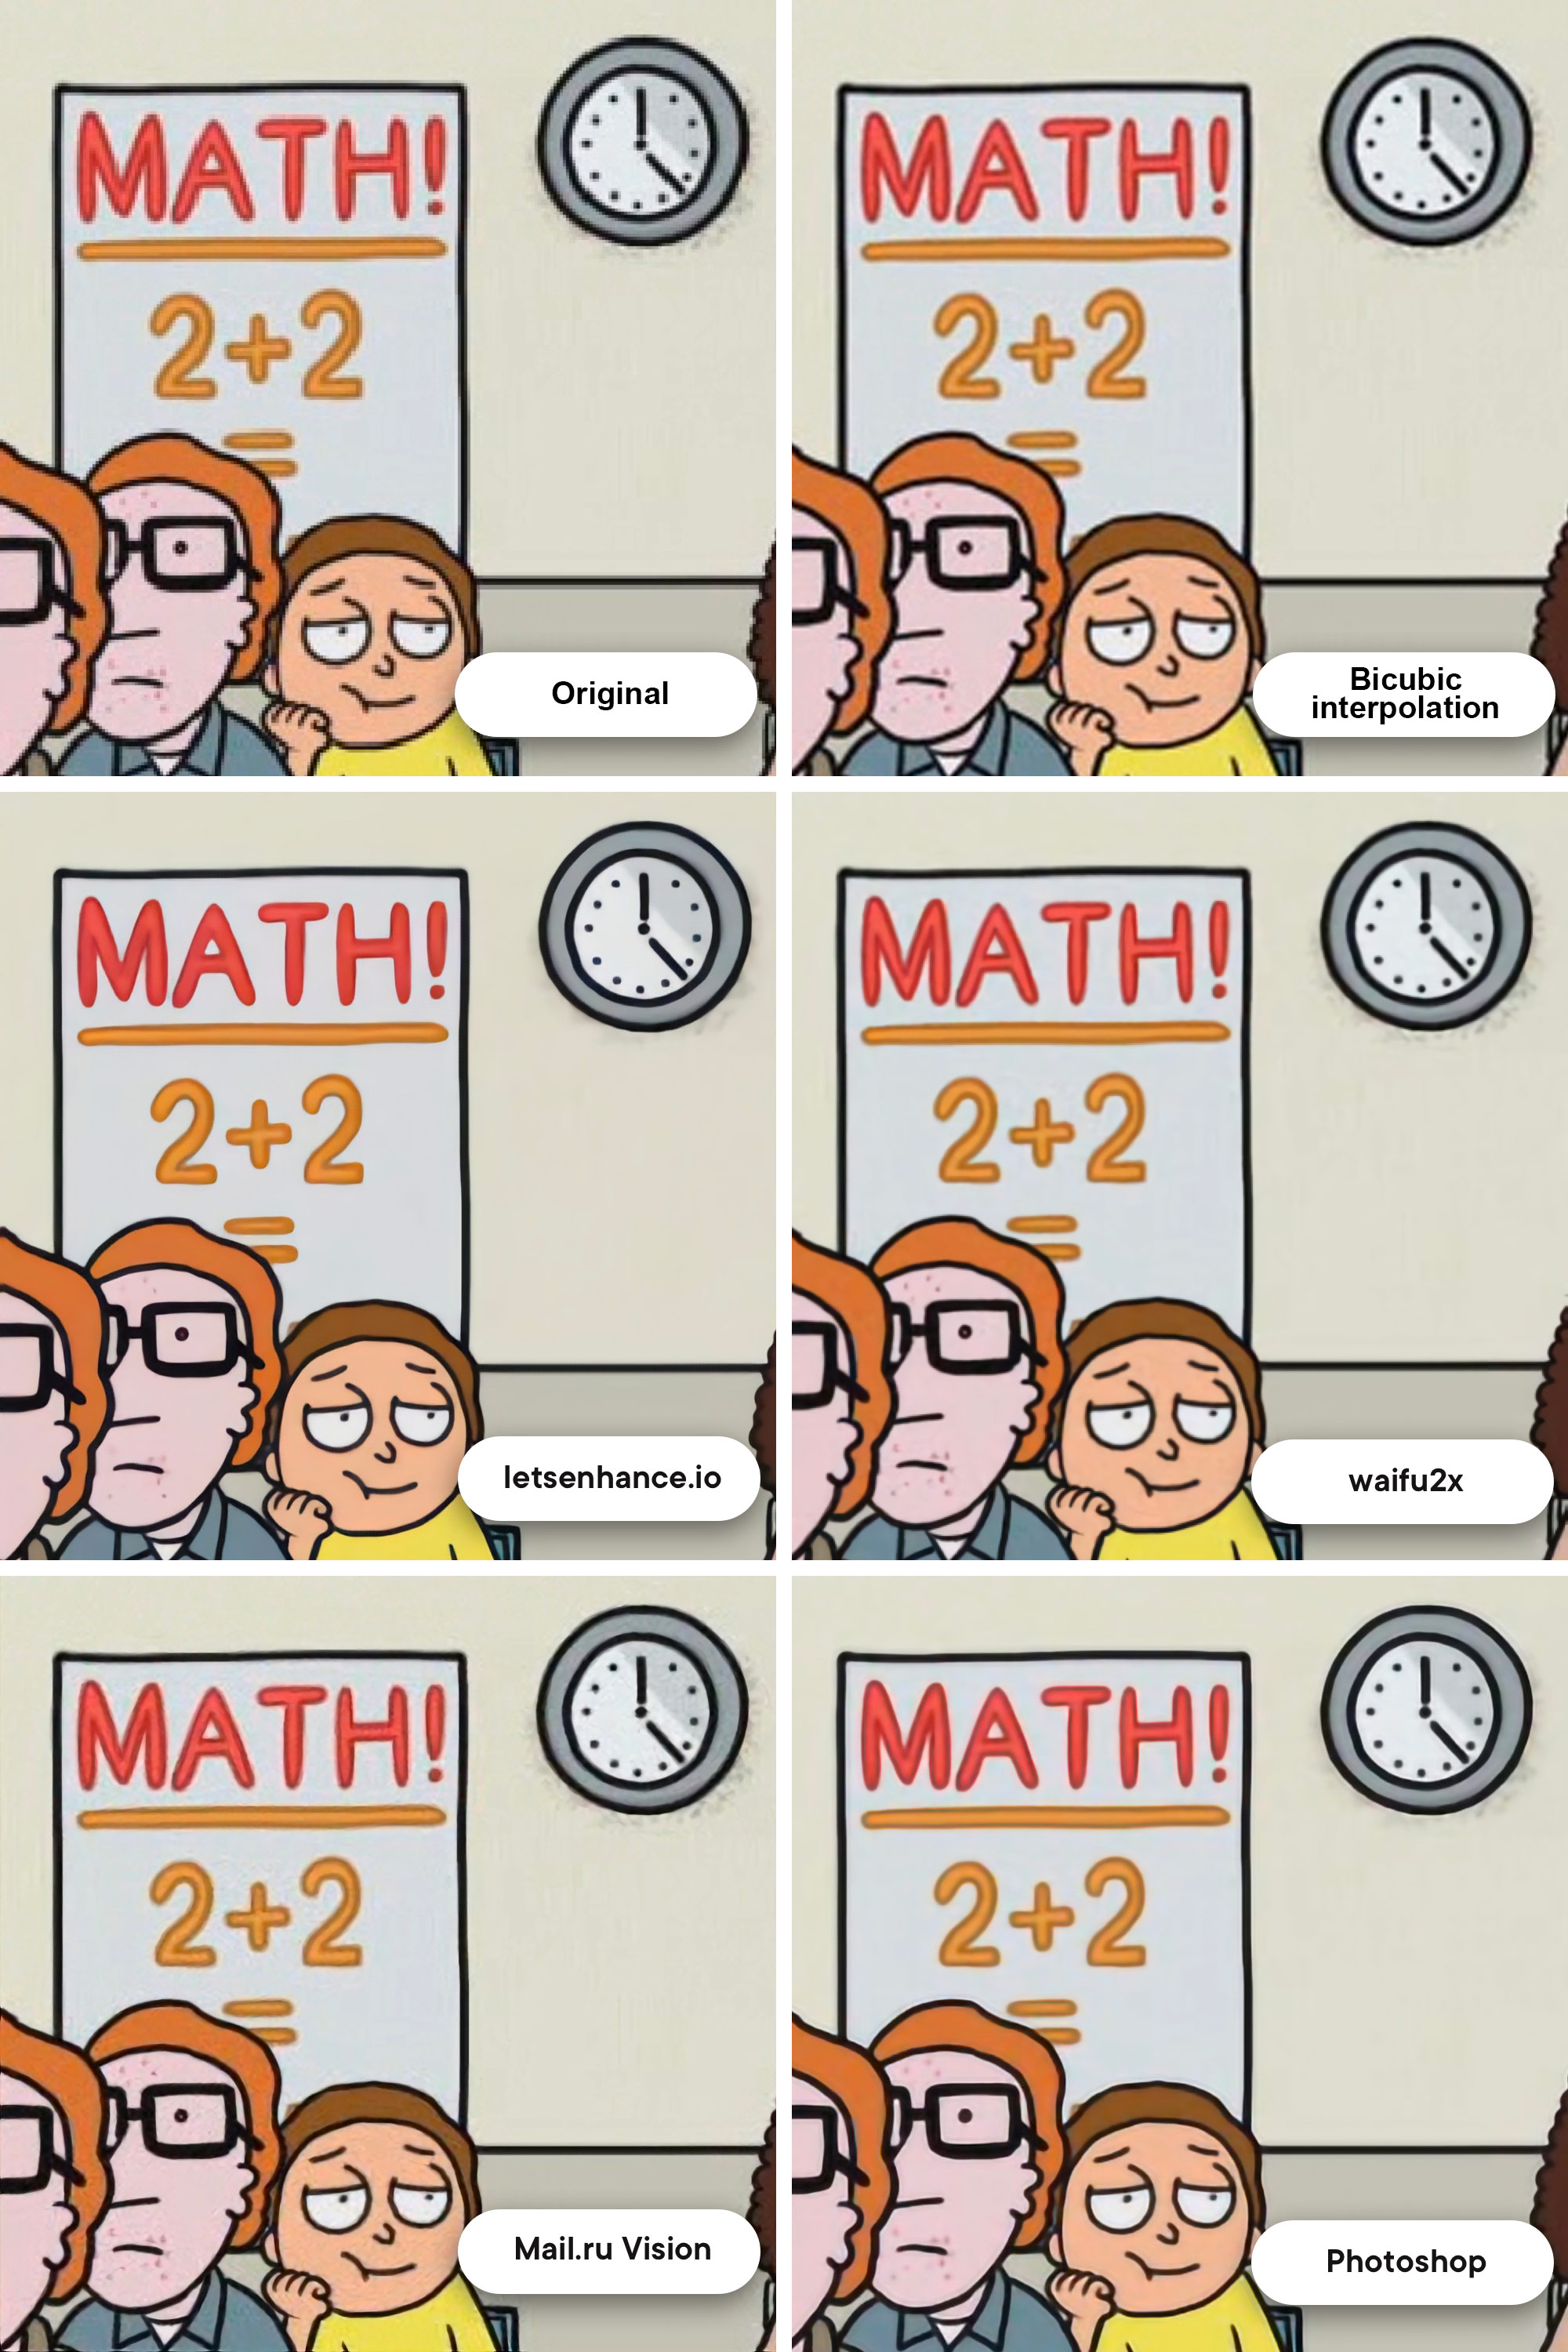
I found three options that worked reasonably well — rather famous Let's Enhance, anime-oriented waifu2x, and Mail.ru Vision.
I’ll show the examples later.
Mail.ru Vision and Let’s Enhance do a good job, but unfortunately they aren’t open-source, meaning to process 31 000 images I’d need to write an email to their creators and probably pay quite a bit. Waifu2x is open-source, but the result was rather poor — a lot of noises and artifacts. After all, Rick and Morty is not anime.
I almost resigned myself to digging GitHub and topical forums, but… a saviour appeared! I found a solution that worked on the machine locally, processes 1 image in less than a second and delivers in quality. You won’t believe who came to our rescue once again!
Adobe Photoshop!
And no, I won’t tell a story about how you could enhance a picture with a couple of filters. Adobe actually trained a proper neural network that can “complete” an image when you upscale it within the application!
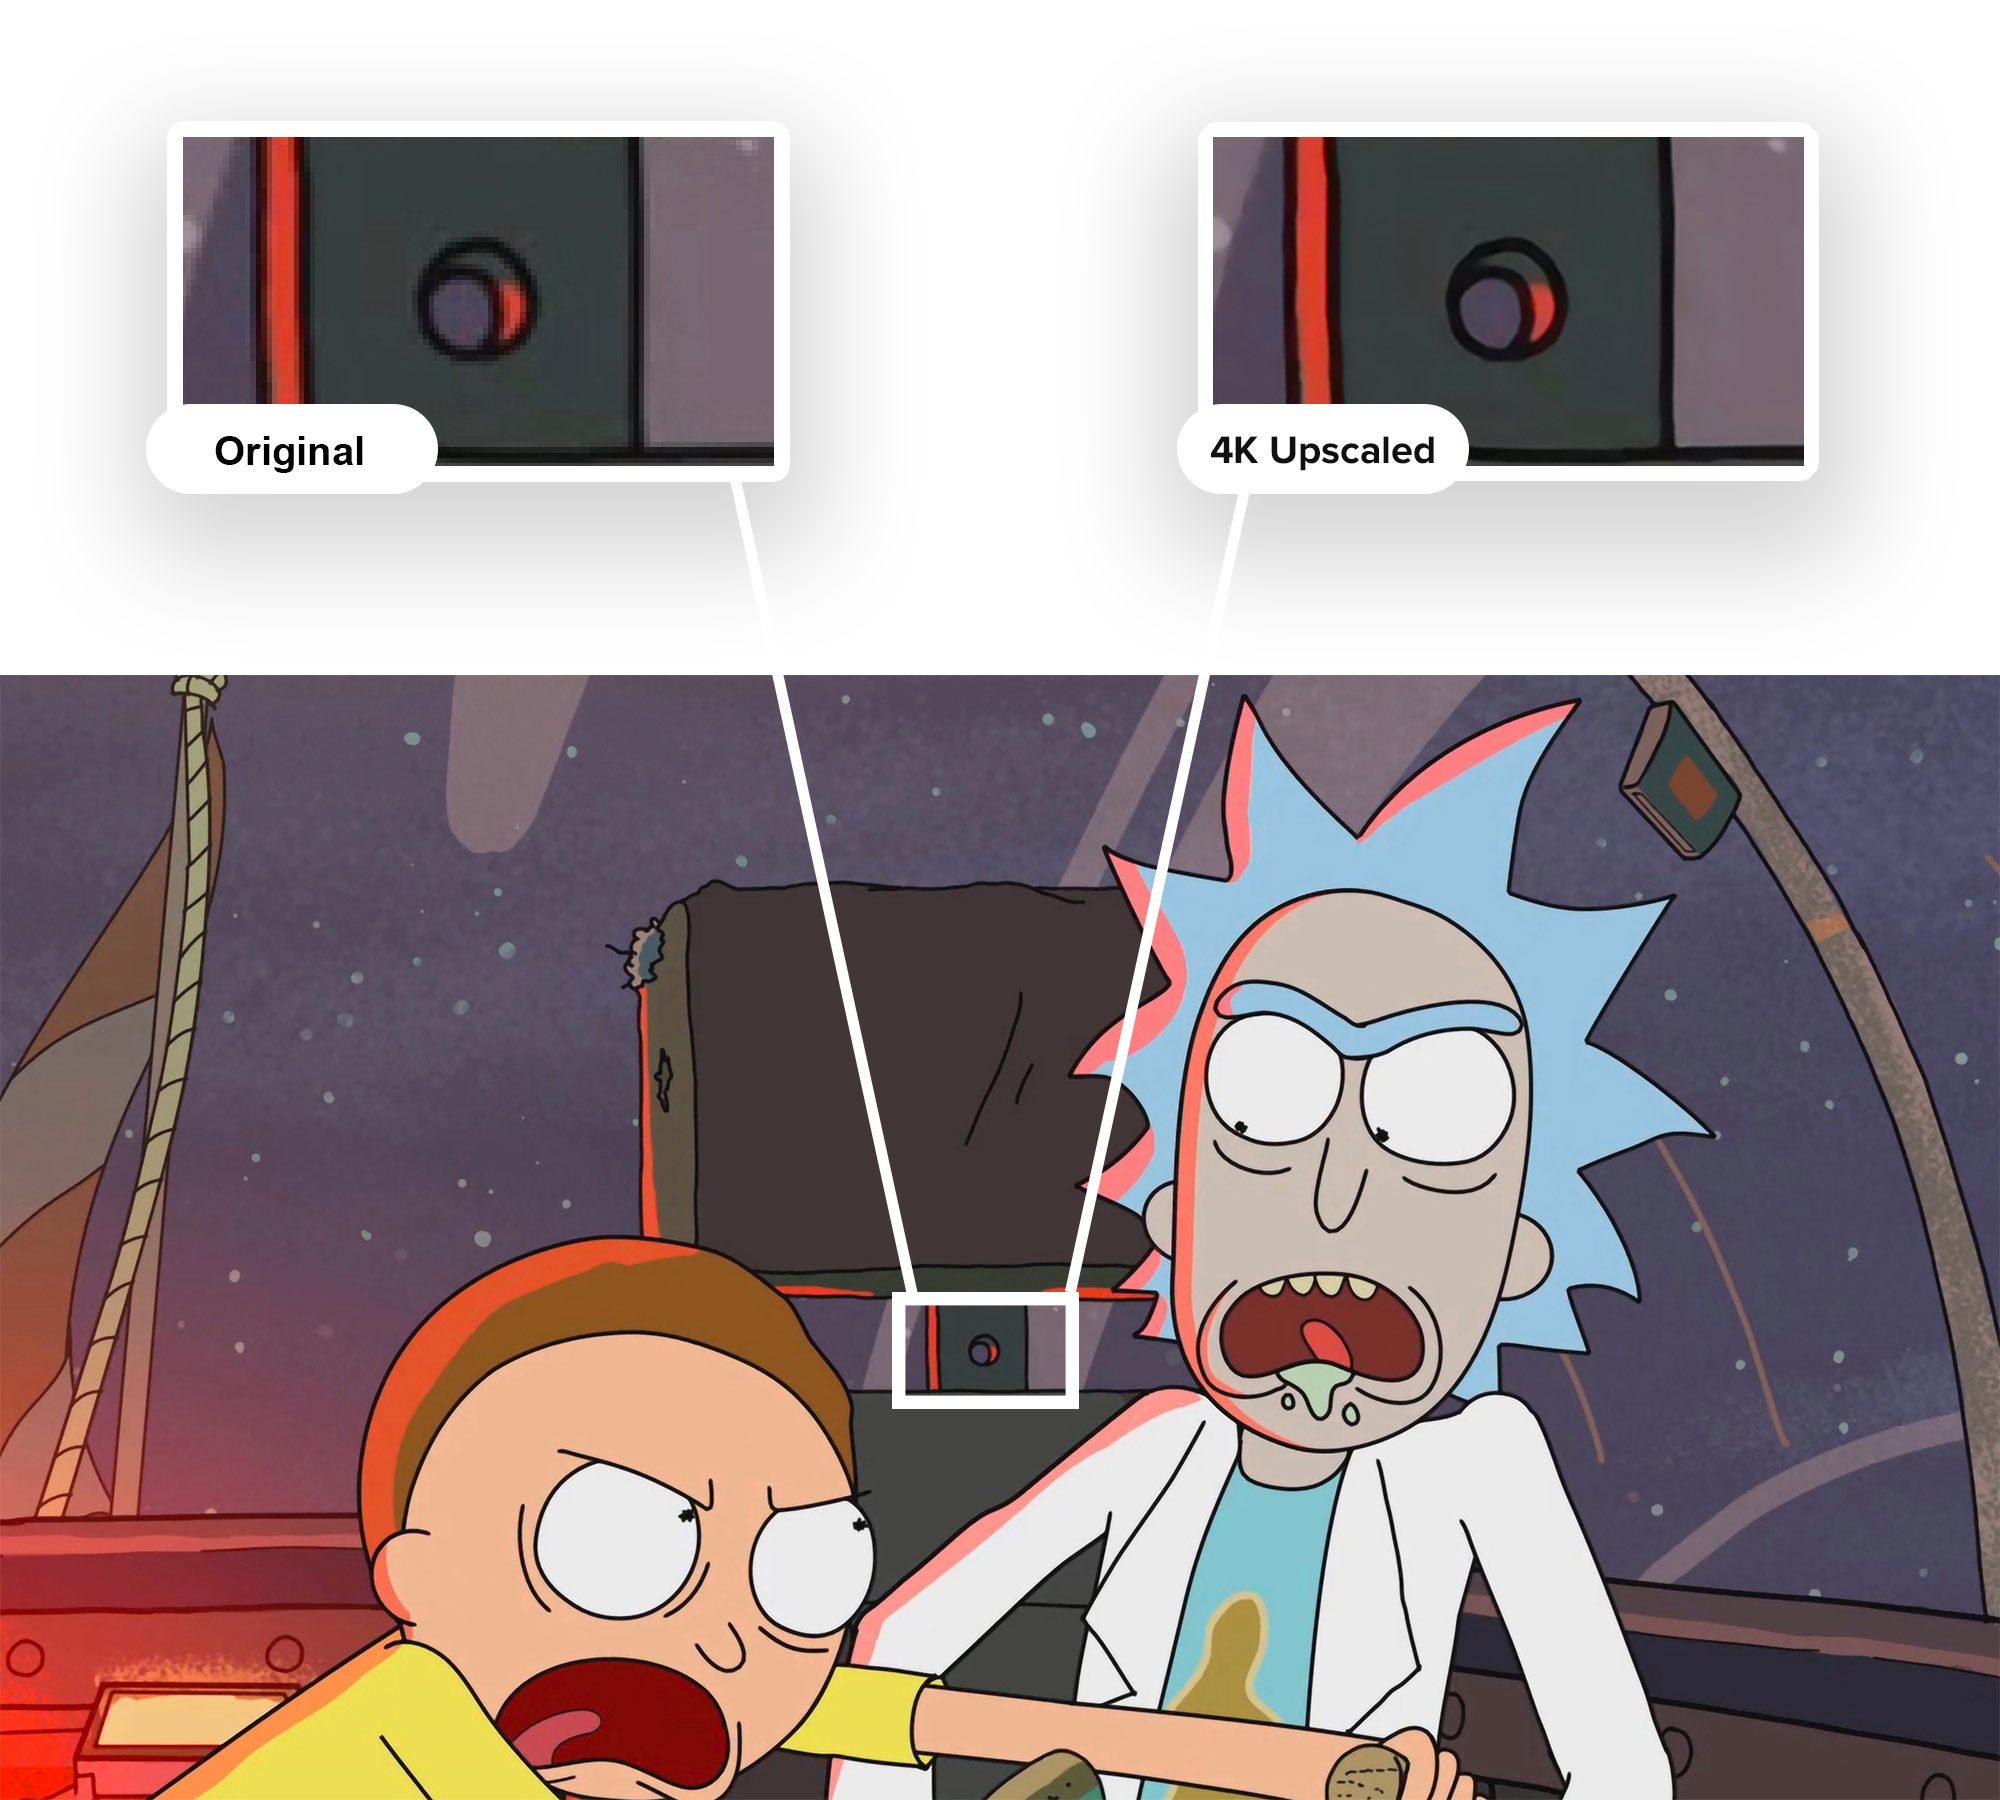
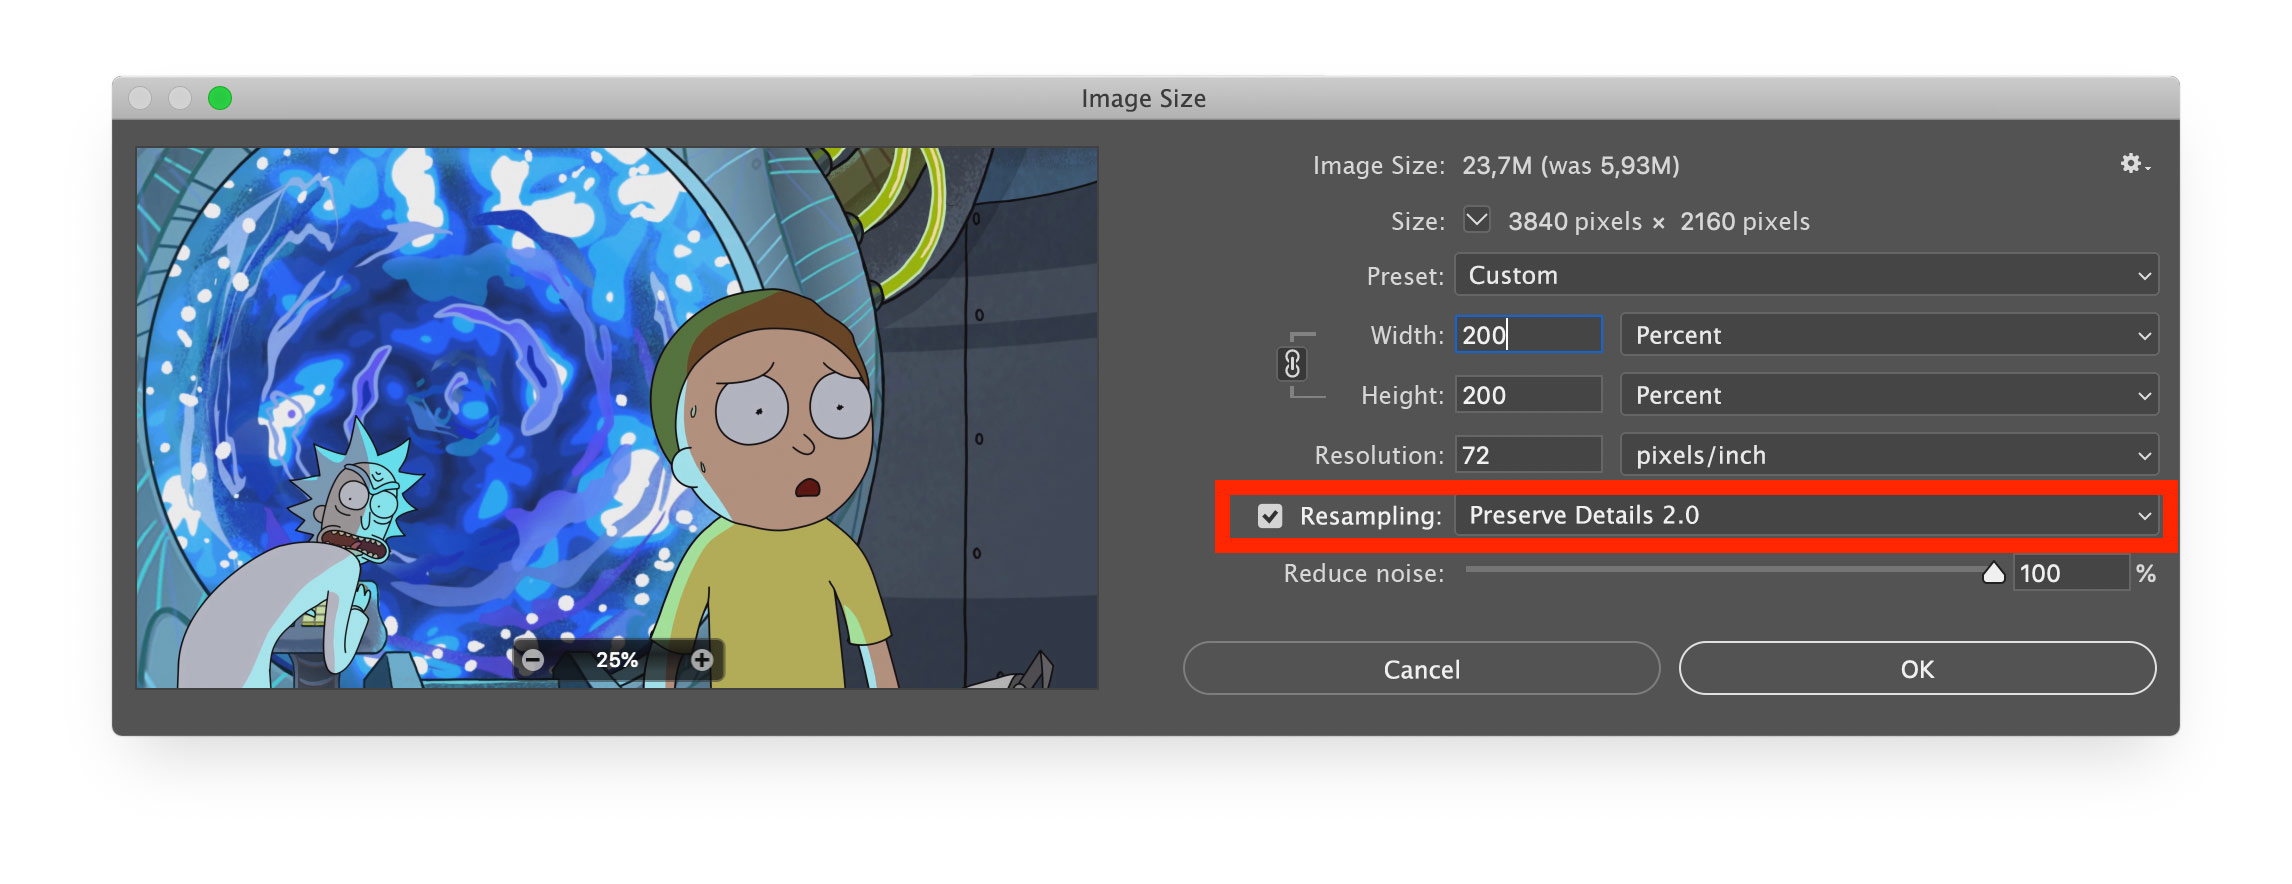
To start, we need to open the source image, go to the top menu, then Image — Image size, and choose the “Preserve Details 2.0” resampling option.
The result was surprisingly good! Probably only trailing Let’s Enhance. Here’s the comparison (with the image zoomed in around 800%):
And what now? Manually process every frame?
Of course not! Photoshop has the Actions tool that allows to first record a sequence of actions, and then apply it to an entire folder of images. The process is a cursory Google search away.
I left my laptop to process 31 000 frames through the night with a simple instruction: “upscale 2x and save”. The next morning everything was ready. I had another folder full of images, but now in 4K and taking up 82GB of disk space.
Back to video
Ffmpeg to the rescue again.
First, we remember we forgot the audio track and extract it out of the original file:
ffmpeg -i RiM01x01_1080p.mp4 -vn -ar 44100 -ac 2 -ab 320K -f mp3 sound.mp3Then we put the sound file into the folder with all the 4K images. We’re now ready for the final montage!
ffmpeg -i 01x01_%05d.jpg -i sn.mp3 -vcodec libx264 -preset veryslow -crf 10 -r 23.976 RiM_01x01_4K.mp4Be careful: after -r specify the exact framerate of the original, or else the audio track would misalign with the video!
It’s done!
We now have the first episode of Rick and Morty in 4K. Here is the sample video. Of course, the whole process was a bit amateurish, but this approach has a serious advantage. While importing the images into Photoshop we can manually tinker with them to get it just right. Adjust the focus, color balance based on a couple of frames, write it into an Action, apply to the whole video and — voila! A perfect result without too much math trickery. This brings “miracle upscaling” a bit closer to an average user. The most complex of technologies that have been in development for centuries can not be used fast and without special knowledge — what is it, if not the future?
Комментарии (7)

sadfun Автор
27.02.2019 16:36+1No, ffmpeg did each operation just in 35 minutes (MacBook Pro 2018, core i7)

kireevmp
27.02.2019 16:39+1Potentially, other enhancing methods (not Photoshop, I mean) make possible to build a cluster of parallel jobs to enhance all the images really fast, so it'll be like a great system of making low-res films beautiful in real time (or not real, but very fast)
limassolsk
27.02.2019 17:29The question without answer from previous post:
Did you try to do the same by using ffmpeg only?
ffmpeg -i input.mp4 -vf scale=3840:-2 -c:v libx264 -preset slow -crf 22 -c:a copy output.mp4sadfun Автор
27.02.2019 17:56This is a regular scale, the result will have more pixels, but the same quality as the original.

kikiwora
27.02.2019 18:30That's definitely quite handy.
But question, is it possible to do upscale in real time?
The thing is I often don't have enough free space, and thus wouldn't be able to convert movies using this method. Is is interesting, but not really viable.
And, well, ofc if i want to download some movies to my disk, I'll need even more disk storage for 4K versions, but if the real-time upscale is possible using regular video players, this problem could be easily avoided.
Also, I would like to know how your method compares to the regular TV/TVBoxes 4K upscales?
I assume that is is possible to use something like VLC filter to upscale video in real-time, but I have no idea how reliable it is compared to this simple, yet working method.
kashey
So, 82 + 26 GB. But what's about the __time__? Probably this is not a quick operation.