
В предыдущей части - Как я переносил блог из CakePHP в Angular, я делился своей историей миграции блога из CakePHP в Angular. В этой статье, я хочу продемонстрировать связку Angular и Contentful. Я по шагам создам новое приложение, добавлю необходимые вендоры, а также реализую требуемые скрипты для загрузки и генерации контента.
Демо можно посмотреть на angular-blog.fafn.ru.
Создание проекта
Создать проект можно с помощью стандартных angular cli:
ng new angular-blogДругой подход - использовать Nx. В настоящий момент Nx это не только monorepo, а также набор удобных утилит для разработки на javascript/typescript. Приятным бонусом при использовании Nx является jest и cypress из коробки.
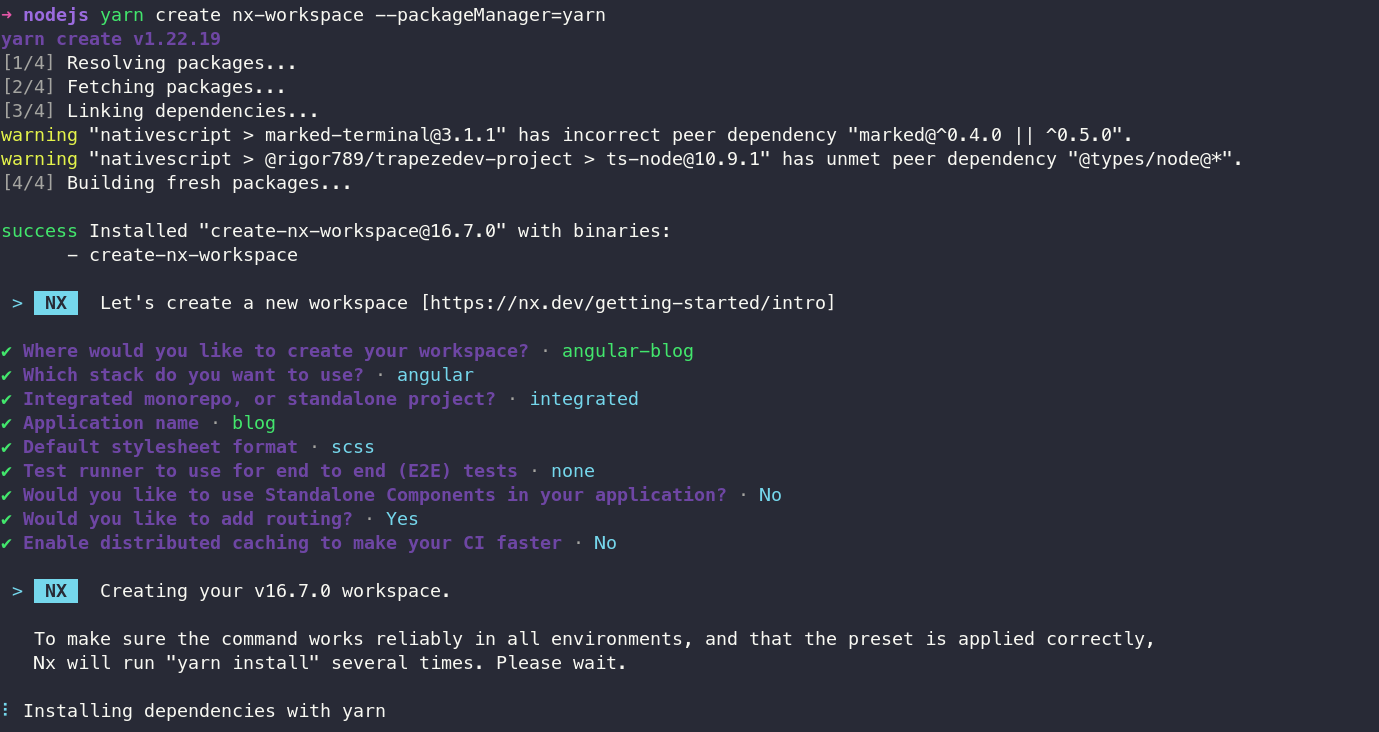
Для генерация нового workspace, достаточно запустить команду:
yarn create nx-workspace --packageManager=yarn
Далее необходимо выполнить пройти шаги:
workspace и задать имя (
angular-blog);angular и ввести название приложения(
blog);выбрать препроцессор (
scss);пропустить
e2eдобавить роутинг
отказаться от cloud;
подождать установку вендоров.
Проект создан и перехожу к настройке.
cd angular-blogКонфигурация проекта
Задам несколько правил для workspace в nx.json:
{
  "$schema": "./node_modules/nx/schemas/nx-schema.json",
  "npmScope": "angular-blog",
  "cli": {
    "packageManager": "yarn",
    "defaultCollection": "@nx/angular"
  },
  "affected": {
    "defaultBase": "develop"
  },
  "tasksRunnerOptions": {
    "default": {
      "runner": "nx/tasks-runners/default",
      "options": {
        "cacheableOperations": ["build", "lint", "test", "e2e"]
      }
    }
  },
  "targetDefaults": {
    "build": {
      "dependsOn": ["^build"],
      "inputs": ["production", "^production"]
    },
    "test": {
      "inputs": ["default", "^production", "{workspaceRoot}/jest.preset.js"]
    },
    "e2e": {
      "inputs": ["default", "^production"]
    },
    "lint": {
      "inputs": ["default", "{workspaceRoot}/.eslintrc.json", "{workspaceRoot}/.eslintignore"]
    }
  },
  "namedInputs": {
    "default": ["{projectRoot}/**/*", "sharedGlobals"],
    "production": [
      "default",
      "!{projectRoot}/**/?(*.)+(spec|test).[jt]s?(x)?(.snap)",
      "!{projectRoot}/tsconfig.spec.json",
      "!{projectRoot}/jest.config.[jt]s",
      "!{projectRoot}/src/test-setup.[jt]s",
      "!{projectRoot}/test-setup.[jt]s",
      "!{projectRoot}/.eslintrc.json"
    ],
    "sharedGlobals": []
  },
  "generators": {
    "@nx/angular:application": {
      "style": "scss",
      "linter": "eslint",
      "unitTestRunner": "jest",
      "e2eTestRunner": "cypress"
    },
    "@nx/angular:library": {
      "linter": "eslint",
      "unitTestRunner": "jest"
    },
    "@nx/angular:component": {
      "style": "scss",
      "changeDetection": "OnPush",
      "standalone": true
    },
    "@schematics/angular:component": {
      "style": "scss",
      "changeDetection": "OnPush",
      "standalone": true
    }
  },
  "defaultProject": "blog"
}
В основном это правила для генерации компонентов и библиотек.
Чтобы в репозиторий не попадал мусор, в .gitignore исключу файлы и директории:
...

# Custom
/mocks/tmp
/apps/**/src/assets/locale
package-lock.json
.env
/apps/**/.env
/apps/**/source.xlf
.husky/*
junit.xml
/junit
/apps/**/dynamic-routes.txt
/apps/**/sitemap.xml
.yarnrc
yarn.lock
/apps/**/routes/blog.routes.ts
/apps/**/routes/*.routes.ts
libs/ui/categories/src/lib/categories.ts
Проект должен выглядеть стройно и опрятно. Поэтому добавлю пару расширений в eslint:
yarn add -D eslint-plugin-import eslint-plugin-jsdoc eslint-plugin-prettier eslint-plugin-simple-import-sortПосле установки в .eslintrc.json вставляю следующие правила:
{
  "root": true,
  "ignorePatterns": ["**/*"],
  "plugins": ["@typescript-eslint", "prettier", "simple-import-sort", "import", "@angular-eslint/eslint-plugin-template", "@nx", "jsdoc"],
  "env": {
    "browser": true,
    "node": true
  },
  "overrides": [
    {
      "files": ["*.ts", "*.tsx", "*.js", "*.jsx"],
      "rules": {
        "@nx/enforce-module-boundaries": [
          "error",
          {
            "enforceBuildableLibDependency": true,
            "allow": [],
            "depConstraints": [
              {
                "sourceTag": "*",
                "onlyDependOnLibsWithTags": ["*"]
              }
            ]
          }
        ]
      }
    },
    {
      "files": ["*.ts"],
      "parserOptions": {
        "project": "./tsconfig.*?.json",
        "createDefaultProgram": true
      },
      "extends": ["plugin:@nx/typescript", "plugin:@nx/angular", "plugin:import/recommended"],
      "rules": {
        "@typescript-eslint/naming-convention": [
          "error",
          {
            "selector": "default",
            "format": ["camelCase"],
            "leadingUnderscore": "allow",
            "trailingUnderscore": "allow",
            "filter": {
              "regex": "^(ts-jest|\\^.*)$",
              "match": false
            }
          },
          {
            "selector": "default",
            "format": ["camelCase"],
            "leadingUnderscore": "allow",
            "trailingUnderscore": "allow"
          },
          {
            "selector": "variable",
            "format": ["camelCase", "UPPER_CASE"],
            "leadingUnderscore": "allow",
            "trailingUnderscore": "allow"
          },
          {
            "selector": "typeLike",
            "format": ["PascalCase"]
          },
          {
            "selector": "enumMember",
            "format": ["PascalCase"]
          }
        ],
        "complexity": "error",
        "max-len": [
          "error",
          {
            "code": 140
          }
        ],
        "no-new-wrappers": "error",
        "no-throw-literal": "error",
        "import/no-unresolved": "off",
        "simple-import-sort/exports": "error",
        "simple-import-sort/imports": [
          "error",
          {
            "groups": [
              ["^\\u0000"],
              ["^@?(?!ekapusta)\\w"],
              ["^@ekapusta?\\w"],
              ["^@?(?!loaney)\\w"],
              ["^@loaney?\\w"],
              ["^\\w"],
              ["^[^.]"],
              ["^\\."]
            ]
          }
        ],
        "sort-imports": "off",
        "import/named": "off",
        "import/first": "error",
        "import/newline-after-import": "error",
        "import/no-duplicates": "error",
        "@typescript-eslint/consistent-type-definitions": "error",
        "no-shadow": "off",
        "@typescript-eslint/no-shadow": "error",
        "no-invalid-this": "off",
        "@typescript-eslint/no-invalid-this": ["warn"]
      }
    },
    {
      "files": ["*.js", "*.jsx"],
      "extends": ["plugin:@nx/javascript"],
      "rules": {}
    },
    {
      "files": ["*.html"],
      "extends": ["plugin:@nx/angular-template"],
      "rules": {
        "max-len": [
          "error",
          {
            "code": 140
          }
        ]
      }
    },
    {
      "files": ["*.component.ts"],
      "extends": ["plugin:@angular-eslint/template/process-inline-templates"]
    }
  ]
}
В .prettierrc задаю предпочитаемые настройки форматирования:
{
  "bracketSpacing": true,
  "printWidth": 140,
  "semi": true,
  "singleQuote": true,
  "tabWidth": 2,
  "useTabs": false
}
Чтобы не следить за чистотой кода, устанавливаю еще пару пакетов:
yarn add -D husky lint-staged Для husky создаю два хука: pre-push, pre-commit.
#!/usr/bin/env sh
. "$(dirname -- "$0")/_/husky.sh"

yarn nx affected:lint
yarn nx affected:test
Также добавляю в корень проекта .lintstagedrc.json с содержимым:
{
  "*": ["nx affected:lint --fix --files", "nx format:write --files"]
}
Установлю пакет universal, который реализует SSR в Angular, чтобы поисковые системы могли индексировать сайт:
yarn ng add @nguniversal/express-engineОтмечу, что при запуске ng, Nx будет трансформировать и предлагать альтернативный вариант. Если команда падает, то нужно в конце добавить параметр --project=name.
Еще меня немного подбешивает русский язык в шаблонах, поэтому установлю пакет локализации:
ng add @angular/localizeНачиная с 15 версии, в Angular изменился процесс сборки приложения для старых устройств. Необходимо создать файл .browserslistrc и указать требуемые правила. Я обычно использую следующую политику:
>0.3%
last 2 Chrome version
last 2 Firefox version
last 2 Edge major versions
last 2 Safari major versions
last 2 iOS major versions
Firefox ESR
Chrome > 60
Firefox > 60
not ios_saf 12.2-12.6
not op_mini all
not dead
Немного изменю конфигурацию appConfig и создам отдельные файлы для браузерной версии приложения.

appConfig:
import { APP_INITIALIZER, ApplicationConfig } from '@angular/core';
import { provideRouter, withEnabledBlockingInitialNavigation, withInMemoryScrolling } from '@angular/router';

import { MetaService, MetricService } from '@angular-blog/core';

import { appRoutes } from './app.routes';

export const appConfig: ApplicationConfig = {
  providers: [
    provideRouter(
      appRoutes,
      withEnabledBlockingInitialNavigation(),
      withInMemoryScrolling({
        anchorScrolling: 'enabled',
        scrollPositionRestoration: 'enabled',
      })
    ),
    {
      provide: APP_INITIALIZER,
      useFactory: (metaService: MetaService, metricService: MetricService) => {
        return () => {
          metaService.init();
          metricService.init();
        };
      },
      multi: true,
      deps: [MetaService, MetricService],
    },
  ],
};
browserConfig:
import { ApplicationConfig, mergeApplicationConfig } from '@angular/core';
import { provideNoopAnimations } from '@angular/platform-browser/animations';

import { appConfig } from './app.config';

const browserConfig: ApplicationConfig = {
  providers: [provideNoopAnimations()],
};

export const config = mergeApplicationConfig(appConfig, browserConfig);
Установлю hammerjs, который позволяет отлавливать события на смартфонах:
yarn add -D hammerjsВ app.config.browser.ts добавлю импорт hammerjs.
Возможно я не умею настраивать CLI, но чтобы минифицировать HTML я запускаю следующий скрипт:
import { minify } from 'html-minifier';
import { existsSync, readdirSync, lstatSync, readFileSync, writeFileSync } from 'node:fs';
import { join } from 'node:path';

function fromDir(startPath: string, filter: string): string[] {
  if (!existsSync(startPath)) {
    console.warn('no dir ', startPath);
    return [];
  }
  const founded = [];
  const files = readdirSync(startPath);
  for (const file of files) {
    const filename = join(startPath, file);
    const stat = lstatSync(filename);
    if (stat.isDirectory()) {
      const foundedIn = fromDir(filename, filter);
      founded.push(...foundedIn);
    } else if (filename.indexOf(filter) >= 0) {
      founded.push(filename);
    }
  }

  return founded;
}

const files = fromDir(`dist/apps/${process.env.PROJECT ?? ''}`, '.html');

for (const filePath of files) {
  const fileContent = readFileSync(filePath, 'utf8');
  const minifiedValue = minify(fileContent.toString(), {
    removeComments: true,
    collapseWhitespace: true,
    minifyCSS: true,
    minifyJS: true,
  });

  writeFileSync(filePath, minifiedValue);
}

console.log(files);
Для его работы необходимо установить html-minifier:
yarn add -D html-minifier @types/html-minifierЕсть несколько крутых библиотек, упрощающих тестирование в Angular. Добавлю их:
yarn add -D ts-mockito jasmine-marbles ng-mocksТак как раннер jest испытывает некоторые трудности с DOM, то установлю пакет:
yarn add -D jest-environment-jsdomСоздам файл jest.jsdom.js:
const JSDOMEnvironment = require('jest-environment-jsdom').default;
const { TextEncoder, TextDecoder } = require('util');

class JSDOMEnvironmentExtended extends JSDOMEnvironment {
  async setup() {
    await super.setup();

    if (typeof this.global.TextEncoder === 'undefined') {
      this.global.TextEncoder = TextEncoder;
      this.global.TextDecoder = TextDecoder;
    }
  }
}

module.exports = JSDOMEnvironmentExtended;
Также необходимо обновить jest.preset.js:
const nxPreset = require('@nx/jest/preset').default;

module.exports = {
  ...nxPreset,
  testEnvironment: `${__dirname}/jest.jsdom.js`,
  collectCoverage: true,
  coverageDirectory: `${process.env.NX_WORKSPACE_ROOT}/coverage/${process.env['NX_TASK_TARGET_PROJECT']}`,
};
Для использования .env в проекте, добавлю dotenv:
yarn add -D dotenvСоздание шаблона приложения
Теперь перейду к разработке шаблона приложения.
Создам библиотеку ui/layout:
nx g lib ui/layoutСгенерирую компонент layout:
yarn nx g c layout --project=ui-layoutРазметка страницы примет следующий вид в layout.component.ts:
<router-outlet name="top"></router-outlet>
<header>
  <router-outlet name="header"></router-outlet>
</header>
<main>
  <router-outlet name="breadcrumbs"></router-outlet>
  <router-outlet></router-outlet>
</main>
<footer>
  <router-outlet name="footer"></router-outlet>
</footer>
<router-outlet name="bottom"></router-outlet>
Добавлю каплю стилей в layout.component.scss:
:host {
  display: flex;
  min-height: 100%;
  flex-direction: column;
  width: 100%;
}

header,
footer {
  flex-shrink: 0;
}

main {
  flex-grow: 1;
  display: flex;
  flex-direction: column;
  width: 100%;

  & > * {
    width: 100%;
  }
}
В LayoutComponent импортирую RouterOutlet, чтобы блоки выводились в нужных местах.
import { ChangeDetectionStrategy, Component } from '@angular/core';
import { RouterOutlet } from '@angular/router';

@Component({
  selector: 'angular-blog-layout',
  templateUrl: './layout.component.html',
  styleUrls: ['./layout.component.scss'],
  changeDetection: ChangeDetectionStrategy.OnPush,
  standalone: true,
  imports: [RouterOutlet],
})
export class LayoutComponent {}
Использую Angular Material, который идеально подходит для моего проекта.
Установлю библиотеки:
yarn add @angular/cdk @angular/material В apps/blog/src/stylesheets буду хранить все файлы scss. Скачаю и закину в папку normalize.scss.
Сделаю пару алиасов на переменные variables.scss:
@use '@angular/material' as mat;

$color-default: mat.get-color-from-palette(mat.$gray-palette, 900);
$color-primary: mat.get-color-from-palette(mat.$indigo-palette, 500);
$color-accent: mat.get-color-from-palette(mat.$pink-palette, A200);
$color-warning: mat.get-color-from-palette(mat.$amber-palette, 500);
$color-danger: mat.get-color-from-palette(mat.$red-palette, 900);
Задам немного глобальных стилей global.scss:
@use 'variables' as variables;

*,
::after,
::before {
  box-sizing: border-box;
}

html,
body {
  height: 100%;
  font-size: 16px;
  color: variables.$color-default;
  font-family:
    Roboto,
    'Helvetica Neue',
    Helvetica,
    Arial,
    Lucida Grande,
    sans-serif;
}

body {
  background-color: var(--mat-toolbar-container-background-color);
  color: var(--mat-toolbar-container-text-color);
}
Создам файл material-theme.scss, который будет содержать настройки оформления:
@use '@angular/material' as mat;

@include mat.core();

$blog-primary: mat.define-palette(mat.$indigo-palette, 500);
$blog-accent: mat.define-palette(mat.$pink-palette, A200, A100, A400);

$dark-theme: mat.define-dark-theme(
  (
    color: (
      primary: $blog-primary,
      accent: $blog-accent,
    ),
    typography: mat.define-typography-config(),
    density: 0,
  )
);

$light-theme: mat.define-light-theme(
  (
    color: (
      primary: $blog-primary,
      accent: $blog-accent,
    ),
    typography: mat.define-typography-config(),
    density: 0,
  )
);

@include mat.all-component-themes($dark-theme);

html[data-theme='light'] {
  @include mat.all-component-colors($light-theme);
}
Подключу все в apps/blog/src/styles.scss:
/* You can add global styles to this file, and also import other style files */
@import './stylesheets/normalize';
@import './stylesheets/material-theme';
@import './stylesheets/global';
Можно занятья шапкой и подвалом. Добавлю header:
yarn nx g lib ui/header
yarn nx g c header --project=ui-header
В header выведу toolbar с логотипом, ссылками на гитхаб и о проекте, а также переключателем темы.
<angular-blog-container>
  <mat-toolbar>
    <angular-blog-menu></angular-blog-menu>
    <angular-blog-logo></angular-blog-logo>
    <span></span>
    <angular-blog-theme-switcher></angular-blog-theme-switcher>
    <angular-blog-about></angular-blog-about>
    <angular-blog-github></angular-blog-github>
  </mat-toolbar>
</angular-blog-container>
header.component.ts
import { ChangeDetectionStrategy, Component } from '@angular/core';
import { MatToolbarModule } from '@angular/material/toolbar';

import { ContainerComponent } from '@angular-blog/ui/container';

import { AboutComponent } from './about/about.component';
import { GithubComponent } from './github/github.component';
import { LogoComponent } from './logo/logo.component';
import { MenuComponent } from './menu/menu.component';
import { ThemeSwitcherComponent } from './theme-switcher/theme-switcher.component';

@Component({
  selector: 'angular-blog-header',
  templateUrl: './header.component.html',
  styleUrls: ['./header.component.scss'],
  changeDetection: ChangeDetectionStrategy.OnPush,
  standalone: true,
  imports: [MatToolbarModule, ThemeSwitcherComponent, ContainerComponent, LogoComponent, MenuComponent, AboutComponent, GithubComponent],
})
export class HeaderComponent {}
Из важного тут только ThemeSwitcherComponent и MenuComponent.
MenuComponent - это мобильное меню, в котором выведен список категорий блога.
ThemeSwitcherComponent - свитчер для dark/light темы. Механизм достаточно простой: при клике меняется свойство у <html>. Так как в проекте используется пререндер, значение храниться в куке.
Верстка:
<button mat-icon-button i18n-aria-label="Header|Theme Switcher" aria-label="Toggle dark and light modes" (click)="onToggle()">
  <mat-icon>dark_mode</mat-icon>
</button>
Реализация свитчера:
import { Platform } from '@angular/cdk/platform';
import { DOCUMENT } from '@angular/common';
import { ChangeDetectionStrategy, Component, DestroyRef, Inject, OnInit } from '@angular/core';
import { takeUntilDestroyed } from '@angular/core/rxjs-interop';
import { FormControl } from '@angular/forms';
import { MatButtonModule } from '@angular/material/button';
import { MatIconModule } from '@angular/material/icon';
import { tap } from 'rxjs';

import { CookieService, WindowService } from '@angular-blog/core';

@Component({
  selector: 'angular-blog-theme-switcher',
  standalone: true,
  templateUrl: './theme-switcher.component.html',
  styleUrls: ['./theme-switcher.component.scss'],
  changeDetection: ChangeDetectionStrategy.OnPush,
  imports: [MatIconModule, MatButtonModule],
})
export class ThemeSwitcherComponent implements OnInit {
  control!: FormControl<boolean>;
  isDark = true;

  constructor(
    private readonly platform: Platform,
    private readonly windowService: WindowService,
    private readonly cookieService: CookieService,
    private readonly destroyRef: DestroyRef,
    @Inject(DOCUMENT) private readonly document: Document
  ) {}

  get mode(): string {
    return this.isDark ? 'dark' : 'light';
  }

  ngOnInit(): void {
    if (this.platform.isBrowser) {
      const prefers = this.windowService.window.matchMedia('(prefers-color-scheme: dark)').matches;
      const themePreference = this.cookieService.get('themePreference');

      this.isDark = themePreference ? themePreference === 'dark' : prefers ?? true;
      this.control = new FormControl<boolean>(this.isDark, { nonNullable: true });
      this.document.documentElement.setAttribute('data-theme', this.mode);

      this.control.valueChanges
        .pipe(
          tap((dark) => {
            this.isDark = dark;
            this.cookieService.set('themePreference', this.mode);
            this.document.documentElement.setAttribute('data-theme', this.mode);
          }),
          takeUntilDestroyed(this.destroyRef)
        )
        .subscribe();
    }
  }

  onToggle(): void {
    this.control.patchValue(!this.isDark);
  }
}
Добавлю footer:
yarn nx g lib ui/footer
yarn nx g c footer --project=ui-footer
В футоре выведу просто ссылки на приложения в маркетах и копирайт.
Стоит упомянуть про ContainerComponent и RowComponent&ColumnComponent.
Контейнер - блок, который выравнивает содержимое по центру.
Строка и колонка - авторская реализация сетки из bootstrap. Я подробно рассказывал про эти решения на медиуме.
Создание структуры данных блога в Contentful
Завожу новую учетку в Contentful.

Cjp
В разделе Content Model создаю новый Content Type - Author.


Автор будет обладать следующими свойствами:
полным именем (
fullName);электронными адресом (
email);биографией (
bio);изображением (
avatar).

Для объединения статей по группам, добавлю еще один тип - Category.
В категории будет всего два поля: имя (name) и путь (slug).

Заведу главную сущность в блоге - Post. Публикация получит следующие свойства:
дата создания (
published);заголовок (
title);описание (
description);категория (
category);изображение (
image);исходный медиа файл (
imageOriginal);автор (
author);название (
headline);интро (
intro);путь (
slug);содержимое (
body);количество просмотров (
views);время прочтения (
readingTime);

Теперь можно заполнить блог контентом. Перехожу в раздел Content.
Для проекта я буду использовать новости с лучшего информационного ресурса - Панорама.
Добавлю несколько авторов:

Создам шесть категорий: политика, общество, наука, экономика, статьи и книги.

Перенесу чуть больше двадцати публикаций, для демонстрации пагинации.

Интерфейсы для работы с Contentful
Создам несколько интерфейсов для загрузки данных из Contentful и размещу их в contentful/common:
yarn nx g lib contentful/commonКаждый элемент в Contentful выражается в sys:
export interface ContentfulSys {
  /**
   * System type ("link")
   */
  readonly type: string;

  /**
   * Link type ("ContentType")
   */
  readonly linkType: string;

  /**
   * Name ("post" | "category" | ...)
   */
  readonly id: string;
}type- тип;linkType- ссылаемый объект;id- имя.
Content Type представляется следующим образом:
export interface ContentfulEntity<T extends object = object> {
  /**
   * Metadata
   */
  readonly metadata: {
    /**
     * Tags
     */
    readonly tags: [];
  };

  /**
   * System
   */
  readonly sys: {
    /**
     * Space (master|stage|testing|...)
     */
    readonly space: {
      readonly sys: ContentfulSys;
    };

    /**
     * UUID
     */
    readonly id: string;

    /**
     * System type
     */
    readonly type: string;

    /**
     * Created date
     */
    readonly createdAt: string;

    /**
     * Updated date
     */
    readonly updatedAt: string;

    /**
     * Environment for space
     */
    readonly environment: {
      readonly sys: ContentfulSys;
    };

    /**
     * Revision
     */
    readonly revision: number;

    /**
     * ContentType
     */
    readonly contentType: {
      readonly sys: ContentfulSys;
    };

    /**
     * Locale
     */
    readonly locale: string;
  };

  /**
   * Entity fields
   */
  readonly fields: T;
}
Contentful имеет один предопределенный тип - Asset, сущность для хранения медиа файлов.
Я не планирую использовать ничего кроме изображений, то тип можно определить так:
export type ContentfulAsset = ContentfulEntity<{
  /**
   * Title
   */
  readonly title: string;

  /**
   * File
   */
  readonly file: {
    /**
     * Original url
     */
    readonly url: string;

    /**
     * Details
     */
    readonly details: {
      /**
       * File size
       */
      readonly size: number;

      /**
       * Image props
       */
      readonly image?: {
        readonly width: number;
        readonly height: number;
      };
    };

    /**
     * File name
     */
    readonly fileName: string;

    /**
     * Content type
     */
    readonly contentType: string;
  };
}>;
Коллекция в API будет отдана в следующем виде:
export interface ContentfulCollection<T extends ContentfulEntity = ContentfulEntity> {
  /**
   * System
   */
  readonly sys: ContentfulSys;

  /**
   * Total
   */
  readonly total: number;

  /**
   * Skip
   */
  readonly skip: number;

  /**
   * Limit
   */
  readonly limit: number;

  /**
   * Items
   */
  readonly items: T[];

  /**
   * Includes entities
   */
  readonly includes?: {
    /**
     * Entities
     */
    readonly Entry: ContentfulEntity[];

    /**
     * Assets
     */
    readonly Asset: ContentfulAsset[];
  };
}
Создам библиотеку и размещу там все необходимое для публикаций:
yarn nx g lib posts/commonПрименяя интерфейсы Contentful, получу interface и dto для категорий:
port { ContentfulAsset, ContentfulEntity, ContentfulSys } from '@angular-blog/contentful/common';

/**
 * Category entity
 */
export interface Category {
  /**
   * Name
   */
  readonly name: string;

  /**
   * Slug
   */
  readonly slug: string;
}

/**
 * Category DTO
 */
export type ContentfulCategory = ContentfulEntity<Category>;
Аналогичная ситуация и с авторами:
/**
 * Author entity
 */
export interface Author {
  /**
   * Full name
   */
  readonly fullName: string;

  /**
   * Email
   */
  readonly email: string;

  /**
   * Bio
   */
  readonly bio?: string;

  /**
   * Avatar
   */
  readonly avatar: string;
}

/**
 * Author DTO
 */
export type ContentfulAuthor = ContentfulEntity<
  Omit<Author, 'avatar'> & {
    /**
     * Avatar asset
     */
    readonly avatar: {
      readonly sys: ContentfulSys;
    };
  }
>;
Самым сложной сущностей является публикация со следующей реализацией:
/**
 * Post entity
 */
export interface Post {
  /**
   * Tags
   */
  readonly tags: string[];

  /**
   * Published date
   */
  readonly published: string;

  /**
   * Meta title
   */
  readonly title: string;

  /**
   * Meta description
   */
  readonly description: string;

  /**
   * Category
   */
  readonly category: Category;

  /**
   * Path to image
   */
  readonly image: string;

  /**
   * Original asset for generate OG
   */
  readonly imageOriginal: ContentfulAsset;

  /**
   * Author
   */
  readonly author: Author;

  /**
   * Title
   */
  readonly headline: string;

  /**
   * Intro
   */
  readonly intro: string;

  /**
   * Slug
   */
  readonly slug: string;

  /**
   * Body
   */
  readonly body: string;

  /**
   * Count views
   */
  readonly views?: number;

  /**
   * Reading time in minutes
   */
  readonly readingTime?: number;
}

/**
 * Post DTO
 */
export type ContentfulPost = ContentfulEntity<
  Omit<Post, 'category' | 'image' | 'author' | 'tags'> & {
    /**
     * Category sys link
     */
    readonly category: {
      readonly sys: ContentfulSys;
    };

    /**
     * Image sys link
     */
    readonly image: {
      readonly sys: ContentfulSys;
    };

    /**
     * Author sys link
     */
    readonly author: {
      readonly sys: ContentfulSys;
    };
  }
>;
Создание страницы записи
Создам библиотеку и компонент для вывода полной публикации:
yarn nx g lib posts/view/page
yarn nx g c post-page --project=posts-view-page
В шаблоне покажу заголовок, автора, дату создания и содержимое статьи:
<h1>{{ post.headline }}</h1>
<p>{{ post.published | date : 'shortDate' }}, {{ post.author.fullName }}</p>
<div>
  <img [src]="post.image" alt="" />
</div>
<div [innerHTML]="post.body | safeHtml"></div>
Так как текст статьи это внешний HTML, добавлю pipe для вывода контента:
import { Pipe, PipeTransform, SecurityContext } from '@angular/core';
import { DomSanitizer } from '@angular/platform-browser';

@Pipe({
  name: 'safeHtml',
  standalone: true,
})
export class SafeHtmlPipe implements PipeTransform {
  constructor(private readonly sanitizer: DomSanitizer) {}

  transform(body: string | null | undefined): string {
    if (!body) {
      return '';
    }

    return this.sanitizer.sanitize(SecurityContext.NONE, this.sanitizer.bypassSecurityTrustHtml(body)) ?? '';
  }
}
Для работоспособности ссылок в теле публикации, необходимо как-то навешать события навигации. Самым простым решением будет просто отслеживание всех a.
import { DatePipe, NgIf } from '@angular/common';
import { AfterViewInit, ChangeDetectionStrategy, Component, ElementRef, OnDestroy, OnInit, Renderer2 } from '@angular/core';
import { ActivatedRoute, Router } from '@angular/router';

import { Post } from '@angular-blog/posts/common';

import { SafeHtmlPipe } from './safe-html.pipe';

@Component({
  selector: 'angular-blog-post-view-page',
  templateUrl: './post-view-page.component.html',
  styleUrls: ['./post-view-page.component.scss'],
  changeDetection: ChangeDetectionStrategy.OnPush,
  standalone: true,
  imports: [NgIf, DatePipe, SafeHtmlPipe],
})
export class PostViewPageComponent implements OnInit, OnDestroy, AfterViewInit {
  post!: Post;

  listenClickFunc!: () => void;

  constructor(
    private readonly activatedRoute: ActivatedRoute,
    private readonly router: Router,
    private readonly elementRef: ElementRef,
    private readonly renderer: Renderer2
  ) {}

  ngOnInit(): void {
    let route = this.activatedRoute.snapshot;

    while (route.firstChild) {
      route = route.firstChild;
    }

    if (route.data['post']) {
      this.post = route.data['post'];
    }
  }

  ngOnDestroy() {
    if (this.listenClickFunc) {
      this.listenClickFunc();
    }
  }

  ngAfterViewInit() {
    const navigationElements = Array.prototype.slice.call(this.elementRef.nativeElement.querySelectorAll('a[routerLink]'));

    navigationElements.forEach((elem) => {
      this.listenClickFunc = this.renderer.listen(elem, 'click', (event) => {
        event.preventDefault();
        void this.router.navigate([elem.getAttribute('routerLink')]);
      });
    });
  }
}
Это не лучшее решение, но для тестового проекта подходит.
Напишите в комментариях, как вы решаете эту проблему.
Создания списка публикаций
Добавлю список превью публикаций:
yarn nx g lib posts/ui/list
yarn nx g c post-list --project=posts-ui-list
Создам карточку для статьи:
yarn nx g lib posts/ui/card
yarn nx g c post-card --project=posts-ui-card
В превью выведу изображение, заголовок и интро.
<mat-card>
  <a [routerLink]="['/', post.slug]" [ngStyle]="post.image | backgroundImage" i18n-aria-label="Post Card|Image" aria-label="Open full post">
  </a>
  <mat-card-header>
    <mat-card-title>{{ post.headline }}</mat-card-title>
  </mat-card-header>
  <mat-card-content>
    <div>{{ post.intro }}</div>
  </mat-card-content>
  <mat-card-actions>
    <a mat-button i18n="Post Card|Read more" [routerLink]="['/', post.slug]">Read more</a>
  </mat-card-actions>
</mat-card>
Для того чтобы не дергалась верстка, выведу изображение с помощью backgroundImage.
import { Pipe, PipeTransform } from '@angular/core';

@Pipe({
  name: 'backgroundImage',
  standalone: true,
})
export class BackgroundImagePipe implements PipeTransform {
  transform(image: string | null | undefined): object | null {
    return typeof image === 'string' && image.length ? { backgroundImage: `url(${image})` } : null;
  }
}
Теперь в списке с публикациями использую карточку:
<angular-blog-row>
  <angular-blog-column web="6" *ngFor="let post of posts">
    <angular-blog-post-card [post]="post"></angular-blog-post-card>
  </angular-blog-column>
</angular-blog-row>
Статьи вывожу в виде простого списка в мобильной версии, и в виде колонок на планшете и пк.
import { NgForOf } from '@angular/common';
import { ChangeDetectionStrategy, Component, Input } from '@angular/core';

import { Post } from '@angular-blog/posts/common';
import { PostCardComponent } from '@angular-blog/posts/ui/card';
import { ColumnComponent, RowComponent, TabletDirective, WebDirective } from '@angular-blog/ui/grid';

@Component({
  selector: 'angular-blog-post-list',
  templateUrl: './post-list.component.html',
  styleUrls: ['./post-list.component.scss'],
  changeDetection: ChangeDetectionStrategy.OnPush,
  standalone: true,
  imports: [NgForOf, PostCardComponent, ColumnComponent, TabletDirective, WebDirective, RowComponent],
})
export class PostListComponent {
  @Input({ required: true }) posts!: Post[];
}
Главная страница и разделы с категориями
Главная страница и раздел категории имеют общий дизайн, поэтому добавлю лейаут:
yarn nx g lib posts/ui/layout
yarn nx g c post-layout --project=posts-ui-layout
В макете создам сетку из двух колонок. В первой будет содержимое, во второй список разделов.
<angular-blog-container>
  <angular-blog-breadcrumbs></angular-blog-breadcrumbs>
  <angular-blog-row>
    <angular-blog-column tablet="8" web="9">
      <router-outlet></router-outlet>
    </angular-blog-column>
    <angular-blog-column tablet="4" web="3" class="no-mobile">
      <angular-blog-title i18n="Post Layout|Categories">Categories</angular-blog-title>
      <angular-blog-post-categories></angular-blog-post-categories>
    </angular-blog-column>
  </angular-blog-row>
</angular-blog-container>
В мобильной версии скрою категории и выведу их в шапке.
Как я и говорил ранее, в блоге может быть много статей. Добавлю компонент пагинации:
yarn nx g lib posts/ui/pagination
yarn nx g c post-pagination --project=posts-ui-pagination
Для отображения других страниц достаточно знать сколько всего их.
<ng-container *ngIf="links">
  <a mat-raised-button [routerLink]="link.route" *ngFor="let link of links">{{ link.label }}</a>
</ng-container>
Поэтому я генерирую объект с двумя свойствами: current и total. Затем просто циклом создаю требуемые ссылки.
import { NgForOf, NgIf } from '@angular/common';
import { ChangeDetectionStrategy, Component, OnInit } from '@angular/core';
import { MatButtonModule } from '@angular/material/button';
import { ActivatedRoute, RouterLink } from '@angular/router';

import { NavigationLink } from '@angular-blog/core';

@Component({
  selector: 'angular-blog-post-pagination',
  templateUrl: './post-pagination.component.html',
  styleUrls: ['./post-pagination.component.scss'],
  changeDetection: ChangeDetectionStrategy.OnPush,
  standalone: true,
  imports: [NgIf, NgForOf, RouterLink, MatButtonModule],
})
export class PostPaginationComponent implements OnInit {
  links!: NavigationLink[];

  constructor(private readonly activatedRoute: ActivatedRoute) {}

  ngOnInit(): void {
    let route = this.activatedRoute.snapshot;

    while (route.firstChild) {
      route = route.firstChild;
    }
    const pagination:
      | {
          readonly page: number;
          readonly total: number;
          readonly route: string;
        }
      | undefined = route.data['pagination'];

    if (pagination && pagination.total !== 1) {
      this.links = Array.from({ length: pagination.total }, (v: unknown, k: number) => {
        return {
          label: `${k + 1}`,
          route: pagination.route === '/feed' && k === 0 ? '/' : k === 0 ? pagination.route : `${pagination.route}/${k + 1}`,
        };
      });
    }
  }
}
Добавлю компонент со списком всех разделов:
yarn nx g lib posts/ui/categories
yarn nx g c post-categories --project=posts-ui-categories
В шаблоне покажу категории:
<mat-card>
  <mat-card-content>
    <angular-blog-categories></angular-blog-categories>
  </mat-card-content>
</mat-card>
Выведу хлебные крошки, чтобы упростить навигацию:
yarn nx g lib ui/breadcrumbs
yarn nx g c breadcrumbs --project=ui-breadcrumbs
Реализация тривиальна:
<ul *ngIf="breadcrumbs.length > 0">
  <li *ngFor="let breadcrumb of breadcrumbs">
    <a [routerLink]="breadcrumb.route">{{ breadcrumb.label }}</a>
  </li>
</ul>
Так как breadcrumbs используются в макете, то необходимо подписаться на событие изменения пути и обновлять их:
import { NgFor, NgIf } from '@angular/common';
import { ChangeDetectionStrategy, ChangeDetectorRef, Component, OnInit } from '@angular/core';
import { takeUntilDestroyed } from '@angular/core/rxjs-interop';
import { ActivatedRoute, NavigationEnd, Router, RouterLink, RouterLinkActive } from '@angular/router';
import { filter, tap } from 'rxjs/operators';

import { NavigationLink } from '@angular-blog/core';

@Component({
  selector: 'angular-blog-breadcrumbs',
  templateUrl: './breadcrumbs.component.html',
  styleUrls: ['./breadcrumbs.component.scss'],
  changeDetection: ChangeDetectionStrategy.OnPush,
  standalone: true,
  imports: [RouterLink, RouterLinkActive, NgIf, NgFor],
})
export class BreadcrumbsComponent implements OnInit {
  breadcrumbs: NavigationLink[] = [];

  constructor(
    private readonly router: Router,
    private readonly activatedRoute: ActivatedRoute,
    private readonly changeDetectorRef: ChangeDetectorRef
  ) {
    this.router.events
      .pipe(
        filter((event) => event instanceof NavigationEnd),
        tap(() => this.update()),
        takeUntilDestroyed()
      )
      .subscribe();
  }

  ngOnInit(): void {
    this.update();
  }

  private update(): void {
    let route = this.activatedRoute.snapshot;

    while (route.firstChild) {
      route = route.firstChild;
    }

    this.breadcrumbs = route.data['breadcrumbs'] ?? [];
    this.changeDetectorRef.markForCheck();
  }
}
Создам страницу, которая будет использоваться для главной и раздела:
yarn nx g lib posts/page
yarn nx g c post-page --project=posts-page
В шаблон добавлю заголовок, список публикаций и пагинацию.
<angular-blog-title i18n="Post Page|Last posts">Last posts</angular-blog-title>
<angular-blog-post-list [posts]="posts"></angular-blog-post-list>
<angular-blog-post-pagination></angular-blog-post-pagination>
Скрипт заполнения блога
Когда с версткой закончено, перейду к написанию скрипта заполнения блога данными.
Алгоритм будет следующим:
Скачивание списка разделов;
Получение всех публикаций и групп статей;
Генерация ленты новостей;
Создание страницы с полным описанием.
Добавлю библиотеку для утилит:
yarn nx g lib contentful/utilsФункция load:
import { get } from 'node:http';
import { catchError, combineLatest, EMPTY, map, Observable, of, switchMap, take, tap } from 'rxjs';

import { ContentfulCollection, ContentfulEntity } from '@angular-blog/contentful/common';

export interface RequestParams {
  readonly contentType: string;
  readonly limit?: number;
  readonly category?: string;
  readonly skip?: number;
}

export const REQUEST_LIMIT = 100;

export function getUrl(payload: RequestParams): string {
  let path = `http://cdn.contentful.com/spaces/${process.env['NX_CONTENTFUL_SPACE']}/environments/master/entries?access_token=${
    process.env['NX_CONTENTFUL_KEY']
  }&content_type=${payload.contentType}&limit=${payload.limit ?? REQUEST_LIMIT}`;

  if (payload.skip) {
    path += `&skip=${payload.skip}`;
  }
  if (payload.category) {
    path += `&fields.category.sys.id=${payload.category}`;
  }

  return path;
}

export function request<T extends ContentfulEntity = ContentfulEntity>(url: string): Observable<ContentfulCollection<T>> {
  return new Observable((observer) => {
    get(url, (response) => {
      const data: Uint8Array[] = [];

      response.on('data', (fragments) => data.push(fragments));

      response.on('end', () => {
        observer.next(JSON.parse(Buffer.concat(data).toString()) as ContentfulCollection<T>);
        observer.complete();
      });
      response.on('error', (error) => {
        observer.error(error);
        observer.complete();
      });
    });
  });
}

export function load<T extends ContentfulEntity = ContentfulEntity>(payload: RequestParams): Observable<ContentfulCollection<T>> {
  const limit = payload.limit ?? REQUEST_LIMIT;

  return new Observable((observer) => {
    request<T>(getUrl(payload))
      .pipe(
        switchMap((result) => {
          if (limit < result.total) {
            let index = 1;
            const requests = [];

            while (index * limit < result.total) {
              requests.push(
                request<T>(
                  getUrl({
                    limit: payload.limit,
                    contentType: payload.contentType,
                    skip: index * limit,
                  })
                )
              );
              index++;
            }
            /* eslint-disable @typescript-eslint/naming-convention */
            return combineLatest(requests).pipe(
              take(1),
              map((response) => {
                return {
                  ...result,
                  items: [...result.items, ...response.map((item) => item.items).reduce((a, c) => a.concat(c), [])],
                  includes: result.includes
                    ? {
                        Asset: [
                          ...result.includes.Asset,
                          ...response.map((item) => item.includes?.Asset ?? []).reduce((a, c) => a.concat(c), []),
                        ],
                        Entry: [
                          ...result.includes.Entry,
                          ...response.map((item) => item.includes?.Entry ?? []).reduce((a, c) => a.concat(c), []),
                        ],
                      }
                    : { Asset: [], Entry: [] },
                };
              })
            );
            /* eslint-enable @typescript-eslint/naming-convention */
          }

          return of(result);
        }),
        tap((result) => {
          observer.next(result);
          observer.complete();
        }),
        catchError((error) => {
          observer.error(error);
          observer.complete();

          return EMPTY;
        })
      )
      .subscribe();
  });
}
Суть в следующем:
Делаем первый запрос.
Если сущностей больше, то создаем несколько параллельных реквестов на загрузку данных и ждем их выполнения. Иначе обрабатываем результат.
Все ответы объединяем в один, в частности это коллекция
itemsиincludes.
Добавлю каст DTO в обычные объекты:
import * as markdown from 'markdown-it';

import { ContentfulAsset, ContentfulCollection } from '@angular-blog/contentful/common';
import { ContentfulAuthor, ContentfulCategory, ContentfulPost, Post } from '@angular-blog/posts/common';

const md = markdown();

export function castPost(
  postDto: ContentfulPost,
  categories: Record<string, ContentfulCategory>,
  authors: Record<string, ContentfulAuthor>,
  images: Record<string, ContentfulAsset>
): Post {
  return {
    tags: postDto.metadata.tags,
    published: postDto.fields.published ?? postDto.sys.createdAt,
    title: postDto.fields.title,
    description: postDto.fields.description,
    category: {
      slug: categories[postDto.fields.category.sys.id].fields.slug,
      name: categories[postDto.fields.category.sys.id].fields.name,
    },
    image: images[postDto.fields.image.sys.id].fields.file.url,
    imageOriginal: images[postDto.fields.image.sys.id],
    author: {
      fullName: authors[postDto.fields.author.sys.id].fields.fullName,
      email: authors[postDto.fields.author.sys.id].fields.email,
      avatar: images[authors[postDto.fields.author.sys.id].fields.avatar.sys.id].fields.file.url,
      bio: authors[postDto.fields.author.sys.id].fields.bio,
    },
    headline: postDto.fields.headline,
    intro: postDto.fields.intro,
    slug: postDto.fields.slug,
    body: postDto.fields.body?.length > 0 ? md.render(postDto.fields.body).replace(/(\r\n|\n|\r)/gm, '') : '',
    views: postDto.fields.views,
    readingTime: postDto.fields.readingTime,
  };
}

export function castPosts(data: ContentfulCollection<ContentfulPost>): Post[] {
  const categories: Record<string, ContentfulCategory> = {};
  const authors: Record<string, ContentfulAuthor> = {};
  const images: Record<string, ContentfulAsset> = {};

  if (data.includes) {
    data.includes.Entry.forEach((entry) => {
      if (entry.sys.contentType.sys.id === 'category') {
        categories[entry.sys.id] = entry as ContentfulCategory;
      } else if (entry.sys.contentType.sys.id === 'author') {
        authors[entry.sys.id] = entry as ContentfulAuthor;
      }
    });

    data.includes.Asset.forEach((asset) => {
      images[asset.sys.id] = asset as ContentfulAsset;
    });
  }

  return data.items.map((item) => castPost(item, categories, authors, images));
}
Создам утилиту генерации страницы с полным описанием:
import { ContentfulCollection } from '@angular-blog/contentful/common';
import { ContentfulPost, Post } from '@angular-blog/posts/common';

import { castPosts } from './cast.util';

export interface RoutePayload {
  readonly data: ContentfulCollection<ContentfulPost>;
  readonly template: (posts: Post[], index: number, total: number) => string;
  readonly templateView?: (post: Post) => string;
  readonly limit?: number;
}

export function createRoutes(payload: RoutePayload): string[] {
  const routes: string[] = [];
  const posts: Post[] = castPosts(payload.data);

  const total = posts.length;
  const limit = payload.limit ?? 4;

  for (let index = 0; index * limit < posts.length; index++) {
    routes.push(payload.template(posts.slice(index * limit, (index + 1) * limit), index, Math.ceil(total / limit)));
  }

  const templateView = payload.templateView;
  if (typeof templateView === 'function') {
    posts.forEach((post) => {
      routes.push(templateView(post));
    });
  }

  return routes;
}
Шаблоны поста и категории вынесу в отдельные методы:
import { Post } from '@angular-blog/posts/common';

export function getPostViewRoure(post: Post): string {
  return `  {
    path: '',
    loadComponent: () => import('@angular-blog/posts/view/page').then((modules) => modules.PostViewPageComponent),
    data: {
      post: ${JSON.stringify(post)},
      sitemap: {
        loc: '/${post.slug}',
      },
      meta: {
        title: '${post.title}',
        description: '${post.description}',
        image: '${post.image}',
        imageType: '${post.imageOriginal.fields.file.contentType}',
        imageWidth: '${post.imageOriginal.fields.file.details.image?.width ?? 800}',
        imageHeight: '${post.imageOriginal.fields.file.details.image?.height ?? 450}',
      },
      breadcrumbs: [
        {
          label: 'Блог',
          route: '/',
        },
        {
          label: '${post.category.name}',
          route: '/category/${post.category.slug}',
        },
      ],
    },
  }`;
}

export function getPostCategoryRoute(posts: Post[], index: number, total: number): string {
  const category = posts[0].category;

  return `  {
    path: '',
    loadComponent: () => import('@angular-blog/posts/page').then((modules) => modules.PostPageComponent),
    data: {
      posts: ${JSON.stringify(posts)},
      sitemap: {
        loc: '/category/${category.slug}${index > 0 ? '/' + (index + 1) : ''}',
      },
      meta: {
        title: '${category.name} от ${new Date().toLocaleDateString()} - Angular blog',
        description: 'Последние новости в категории: ${category.name}',
      },
      breadcrumbs: [
        {
          label: 'Блог',
          route: '/',
        },
        {
          label: '${category.name}',
          route: '/category/${category.slug}',
        },
      ],
      pagination: {
        page: ${index + 1},
        total: ${total},
        route: '/category/${category.slug}',
      },
    },
  }`;
}

export function getHomeRoute(posts: Post[], index: number, total: number): string {
  return `  {
    path: '',
    loadComponent: () => import('@angular-blog/posts/page').then((modules) => modules.PostPageComponent),
    data: {
      posts: ${JSON.stringify(posts)},
      sitemap: {
        loc: '${index > 0 ? '/feed/' + (index + 1) : '/'}',
      },
      meta: {
        title: 'Новости от ${new Date().toLocaleDateString()} - Angular blog',
        description: 'Последние новости на сайте',
      },
      breadcrumbs: [
        {
          label: 'Блог',
          route: '/',
        },
      ],
      pagination: {
        page: ${index + 1},
        total: ${total},
        route: '/feed',
      },
    },
  }`;
}

export function getRouteSeparate(path: string, hash: string | number): string {
  return `  {
    path: '${path}',
  loadChildren: () => import('./blog-${hash}.routes').then((modules) => modules.blogRoutes),
  }`;
}
Для записи результатов воспользуюсь этим:
import { writeFileSync } from 'node:fs';

import { getRouteSeparate } from './route.util';

export function writeRoutes(fileName: string, routes: string[]): void {
  writeFileSync(
    fileName,
    `import { Route } from '@angular/router';\n\n/* eslint-disable max-len */\nexport const blogRoutes: Route[] = [\n${routes.join(
      ',\n',
    )}\n];`,
  );
}

export function writeCategories(fileName: string, categories: object[]): void {
  writeFileSync(
    fileName,
    // eslint-disable-next-line max-len
    `import { Category } from '@angular-blog/posts/common';\n\n/* eslint-disable max-len */\nexport const categories: Category[] = ${JSON.stringify(
      categories,
    )};`,
  );
}

export function writeRoutesSeparate(fileName: string, routes: string[]): void {
  const separateRoutes: string[] = [];

  routes.forEach((route, index) => {
    writeRoutes(`apps/blog/src/app/routes/blog-${index}.routes.ts`, [route]);
    const match = route.match(/loc: '.+?'/);
    const path = match ? match[0].slice(7, -1) : '';

    separateRoutes.push(getRouteSeparate(path, index));
  });

  writeRoutes(fileName, separateRoutes);
}
В конце реализую функцию, которая будет загружать данные и генерировать страницы:
import { combineLatest, switchMap, take, tap } from 'rxjs';

import { ContentfulCollection } from '@angular-blog/contentful/common';
import { ContentfulCategory, ContentfulPost } from '@angular-blog/posts/common';

import { createRoutes } from './create.util';
import { load } from './load.util';
import { getHomeRoute, getPostCategoryRoute, getPostViewRoure } from './route.util';
import { generateSitemap } from './sitemap.util';
import { writeCategories, writeRoutesSeparate } from './write.util';

export function generate(payload: { readonly categoryPath: string; readonly postsPath: string; readonly pageLimit?: number }): void {
  const categories: Record<string, object> = {};

  load<ContentfulCategory>({ contentType: 'category' })
    .pipe(
      tap((response) =>
        response.items.forEach((item) => {
          categories[item.sys.id] = {
            name: item.fields.name,
            slug: item.fields.slug,
          };
        }),
      ),
      switchMap((response) => {
        const requests = [load<ContentfulPost>({ contentType: 'post' })];

        if (response.items.length > 0) {
          requests.push(
            ...response.items.map((item) =>
              load<ContentfulPost>({
                contentType: 'post',
                category: item.sys.id,
              }),
            ),
          );
        }

        // First, we will load all posts, second we will load posts by category
        return combineLatest(requests);
      }),
      take(1),
      tap((result: ContentfulCollection<ContentfulPost>[]) => {
        const categoriesWithPosts: object[] = [];

        const routes = result
          .map((data, index) => {
            if (index === 0) {
              return createRoutes({
                data,
                template: getHomeRoute,
                templateView: getPostViewRoure,
                limit: payload.pageLimit,
              });
            }

            if (data.items.length > 0) {
              const category = categories[data.items[0].fields.category.sys.id];

              if (category) {
                categoriesWithPosts.push(category);
              }
            }

            return createRoutes({
              data,
              template: getPostCategoryRoute,
              limit: payload.pageLimit,
            });
          })
          .reduce((acc: string[], current: string[]) => acc.concat(current), [] as string[]);

        // Write posts
        writeRoutesSeparate(payload.postsPath, routes);

        // Write categories for menu
        writeCategories(payload.categoryPath, categoriesWithPosts);

        // Generate sitemap and routes for prerender
        generateSitemap('blog');
      }),
    )
    .subscribe();
}
Создам load-content.ts, который будет вызывать generate:
import { config } from 'dotenv';

import { generate } from '@angular-blog/contentful/utils';

config({
  path: 'apps/blog/.env',
});

generate({
  categoryPath: 'libs/ui/categories/src/lib/categories.ts',
  postsPath: 'apps/blog/src/app/routes/blog.routes.ts',
});
Сборка приложения
Генерация блога выполняется запуском команды:
yarn ts-node --project=apps/blog/tsconfig.contentfull.json apps/blog/src/load-content.ts
Сборка проекта:
yarn nx run blog:prerender:production
Модифицируем HTML:
PROJECT=blog yarn ts-node minifier.tsДля SSR добавлю раздачу шаблонов dark/light темы:
PROJECT=blog yarn ts-node ./scripts/light-mode.tsЗапуск сервера:
node dist/apps/blog/server/ru/main.js
Откроем в браузере:

В мобильной версии:

Резюме
Трудно написать веселый туториал. Кратко изложу проделанную работу.
Сначала создается приложение со всякой вкусовщиной.
Потом добавляются две страницы. Одна для вывода списка материалов, вторая для отображения полной публикации.
После в Contentful заводится структура блога, где определяются сущности и соответствующие материалы.
В конце идет написание скрипта, который выгребает из Contentful все статьи и генерирует страницы для Angular.
Фичи, которые есть в приложении, но опущены в рамках статьи:
Настройка SSR и пререндера;
Создание карты сайта;
Добавления мета тегов для SEO;
Использование локализации;
Переключение тем (светлая/темная);
Оптимизация генерации роутов для ускорения работы Angular router.
Исходный код на github поможет более подробно ознакомиться с проектом — https://github.com/Fafnur/angular‑blog.