

Atom for Python
(This article is also available on Medium)
You’ve just installed Atom, and now you want to write Python code convenient way. You need language-related features such as:
Code auto-formatting
Autocompletion as you type
Docstring generator
Go-to-definition and Signature Help features
Hyperclick (when you can open a source code of function, class, or module by clicking on its name)
MyPy in a live-mode
After spending about 10 hours trying to figure out the best way, I ready to show you the shortest road. I’ve had Atom instance set up on Windows 10, but I think these steps should work in any OS.
Linter VS Diagnostics
It took so much time for me to set up Atom for the first time because I could choose the Linter tool or Diagnostics Tool but not both of them. I found the Diagnostics Tool to be much more helpful because it has autoformatting built-in and provides a convenient linter’s error output.
Download Atom from the Oficial Page, and follow the instructions.
Open Settings (CTRL + , on Windows) File->Settings

3. Click on Install at the menu bottom.

4. The first plugin we need to install is atom-ide-ui, created by Facebook. Type its name in a search bar and click the Install button.
Install IDE-Python Plugin
The easy part is done. Now let’s go to the terminal. If you’re on Windows, press Win+R, type cmd, and hit Enter.
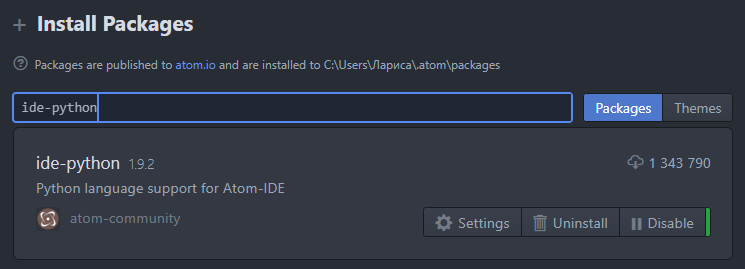
We need to install Atom’s plugin called ide-python developed by atom-community. But we can’t use Atom GUI because, since version 1.9.2, the plugin breaks backward compatibilities and can’t use it with atom-ide-ui anymore.
Let’s install it manually, specifying the version:
apm install ide-python@1.9.1The command above may take some time to execute because of node dependencies that need to be installed. Now let’s install Python libraries that ide-python uses. If you have a different python version (python3 on Unix, for example) or wanna use a virtual environment, just specify a full path to the necessary executable instead of python in the command below:
python -m pip install python-language-server[all]Now restart your Atom and go to File->Settings->Packages->ide-python. Here in the plugin’s settings, you need to provide the absolute path to the python executable you used to install python-language-server in the previous step. (C:\Users\…\Python38\python.exe instead of simply “python” for instance). Also specify pyls, pycodestyle, and flake8 executable paths if they differ from the default on your system.
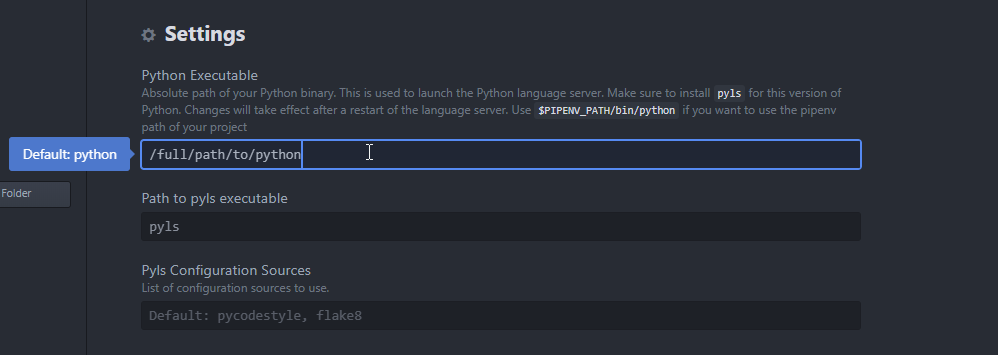
Now scroll down and enable any functionality you want.
Install Additional Plugins
I have almost every checkbox enabled, except PyDocStyle.
I use a less-known docblock-python plugin because it provides me a more convenient way to create a class/function docstrings with printed arguments, types, and exceptions raised. You can pick one of four styles (NumPy, Google, Sphinx, Epytext) and then generate docstrings simply using hotkeys (CTRL+ALT+D on Windows). If you want to install it, go to File->Settings->Install and search for docblock-python. After it’s downloaded and installed, you can change the style of docstrings in the plugin’s settings (File->Settings->Packages->docblock-python).
You can also install the Atom-File-Icons plugin to have file icons similar to the Visual Studio Code instead of boring grey ones.
Closing Words
As you can see, it was pretty straightforward — we just need to downgrade ide-python and install atom-ide-ui to set it all up, but I’ve spent a lot of time figuring out how it works and why it’s not. It seems that since version 1.9.2 of ide-python, they no longer support coupling with atom-ide-ui and depend on external packages, such as atom-ide-base, atom-ide-datatip, atom-ide-definitions, and so on. If you use ide-python 1.9.2 without atom-ide-base or linter packages enabled, you’ll get the message “No providers found.”. Notice though you can’t use Diagnostics Tool (atom-ide-ui) and Linter (atom-ide-base) simultaneously.
If you are a contributor to ide-python, please change this behavior, so users can still use this package with only atom-ide-ui. Until that time, downgrade ide-python and do not update it if you want to use it along with atom-ide-ui as I do.
Thank you for reading.