This is a transcription of a talk that was presented at CSNOG 2020 — video is at the end of the page

Greetings! My name is Alexander Zubkov. I work at Qrator Labs, where we protect our customers against DDoS attacks and provide BGP analytics.
We started using Mellanox switches around 2 or 3 years ago. At the time we got acquainted with Switchdev in Linux and today I want to share with you our experience.

We use Mellanox switches on the Spectrum chipset — the so-called “white-box” switches. It means that you could install various operating systems on it, whichever you want, from different vendors. For example, among those you can see Mellanox’s own operating system — called Onyx. Cumulus also supports the switches. Besides, you have an SDK to create your own environment. Also, there is support for SAI (Switch Abstraction Interface) SDK — as I understand it is an effort to make a standard SDK for switches, which is used by SONiC operating system. And of course, they support switchdev — and that means you can install whatever Linux distribution you like on the Mellanox switch.
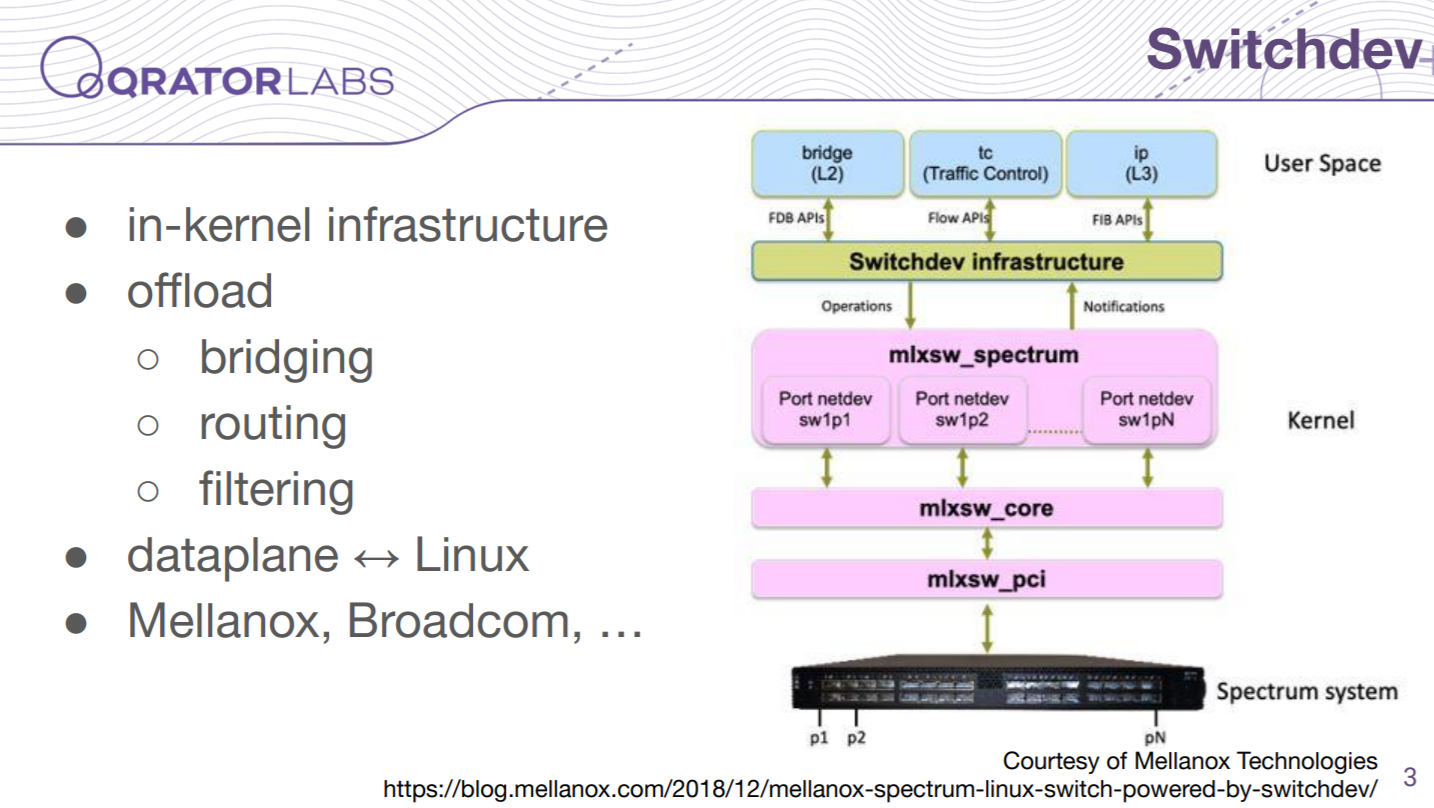
So, what is Switchdev? Switchdev is an in-kernel infrastructure that allows the driver to offload the network configuration from the Linux kernel to the data plane of the switch. So you work with the switch the same way you work with a server with many interfaces. Furthermore, you work with standard Linux primitives like interfaces, routing tables, and so on. Switchdev here makes and provides some generic means to drivers.
Mellanox switches widely support the Switchdev. And I know that some of Broadcom switches also support Switchdev, as well as some other network equipment.

We use the mentioned features in Mellanox switches, which are all supported in hardware and provided into Switchdev. Those are the most common features among switches, except for tunnels, which I think are not that widely popular. However, we like this feature very much.
Some features are missing that we would like to see on that list, like the policy-based routing.

The Mellanox driver which supports Switchdev is included in the main “vanilla” kernel version, so you can use even the kernel version packaged with your distribution if it contains all the required options. And, if you need some bleeding-edge features, you can use the “net-next” version, because the features first arrive there and, after standardization, are transferred to the vanilla kernel.
With the recent driver versions and recent firmwares, you do not need to take care of the switch’s firmware. Because the driver loads the required firmware during the initialization phase, only if you have some old switch firmware, you need to update it once, and then the driver will take care of that.
Of course, the driver needs some firmware image, which is commonly provided by the distribution packages named like “linux-firmware”. If you compile the kernel from source, you need to double-check if your distribution provides the required firmware or whether you need to download it manually. This could happen if it is relatively fresh and recently published.
You need to take care if your driver goes to initramfs and if it does not find the firmware file — it fails the initialization phase, so you have to reload the driver after the boot finishes. We just masked it from initramfs and do not care about it.

Here is an overview of tools we use to configure the Switchdev, consider this a cheat sheet. Of course, there is an iproute set of tools; also I want to note a bridge tool which is used to configure VLAN mapping to ports, and devlink tool which is used to configure features like port split, hardware pool sizes and control plane policy limits. There is also a teamd tool available, which is another option to configure bond interfaces in Linux, but we are quite happy with the ip link tool, so we do not use the former.
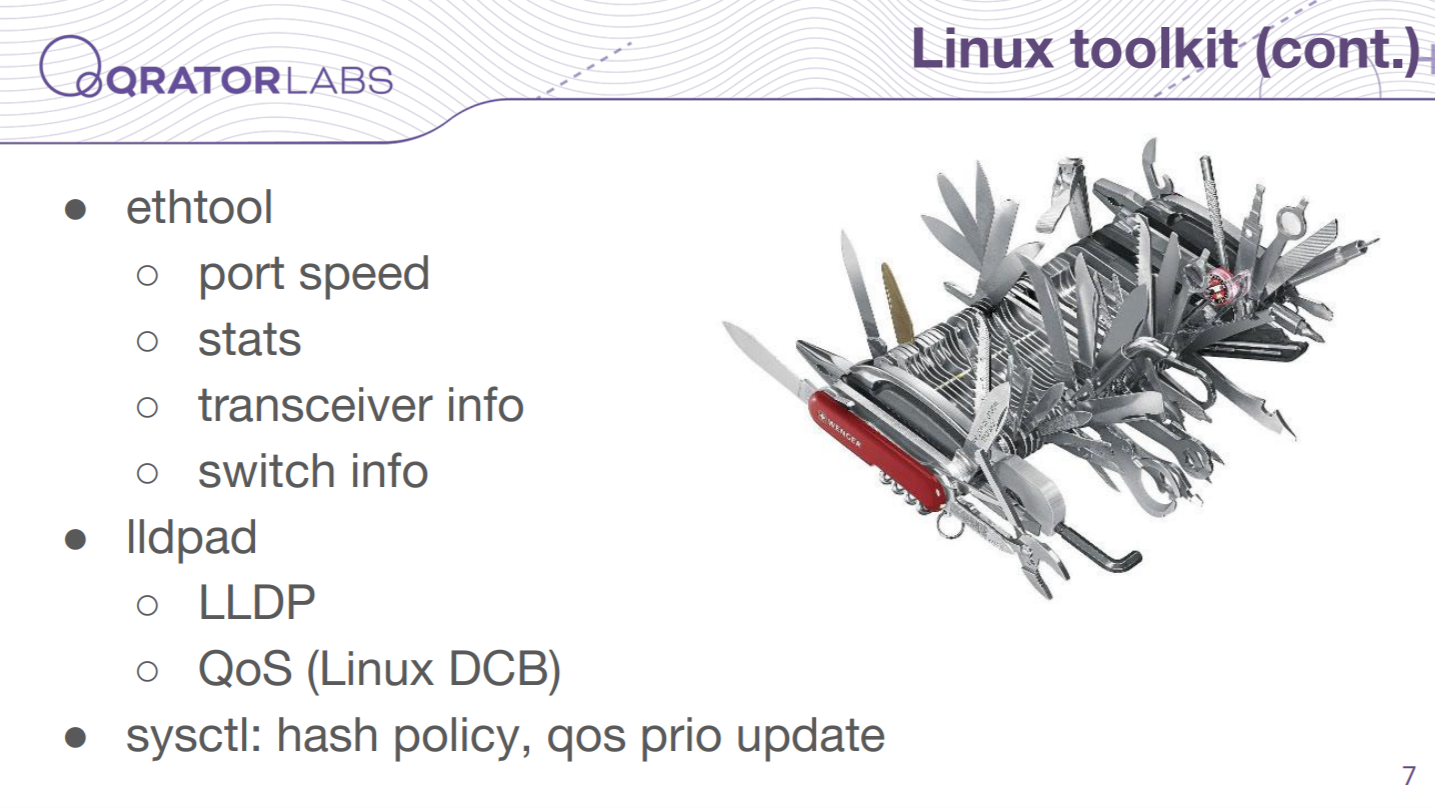
Next tools, like the ethtool we employ to watch port speed, statistics and some other relevant info. There is also llpad which is, surprisingly, used not only for discovery but also to configure some quality of service parameters, and it is called Linux Data Center Bridging. And you can use sysctl to configure some parameters that affect dataplane too.
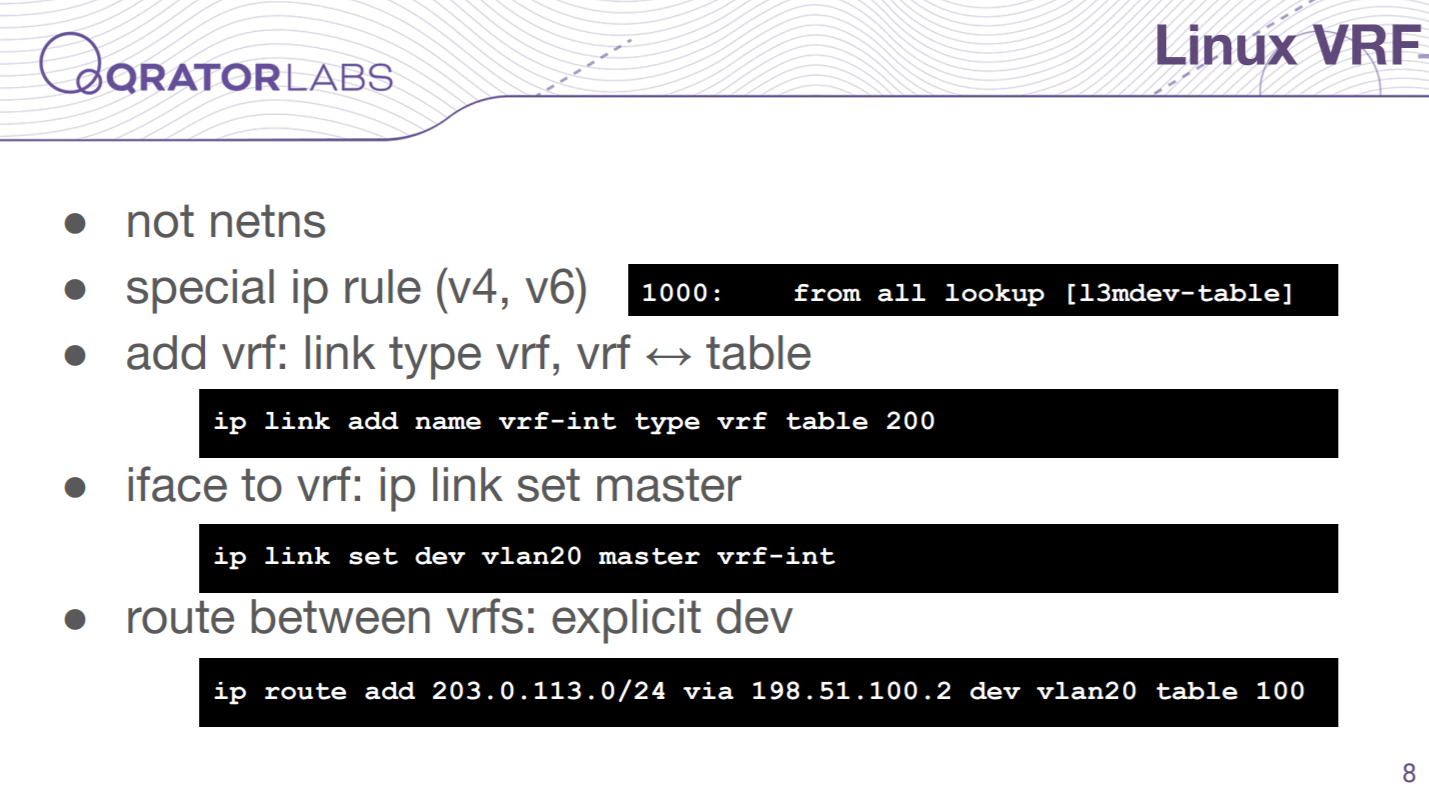
We have virtual routing here but it maps to the Linux vrf subsystem — if you are not familiar with it we should note that it is not the same as the network namespace. You have all your interfaces in the same namespace here, and different routing tables in Linux are used for the routing. There is a special ip rule that manages it. To configure it you need to create some particular vrf type interface and attach your interfaces to it with the help of a master option. There is one interesting feature which is offloaded to the switch too — we can have routes between vrfs. For that, we can add an explicit device option to our route, which points to other vrfs.

So in order to configure your switch you need to make your configuration from the bottom upwards, or from ports to IP addresses and routes. Mostly this is restricted by the structure of Linux configuration, but there are some other restrictions, I could name a few — for example, you cannot attach a port to the bond if the port is up, you need to set it down in advance. Moreover, if you want to attach a port to the bond and the bond is attached to the bridge now — you will not be able to do that, you need to detach the bond from the bridge before.
At the beginning we had a big initialization script for that — it is mostly okay, although when we want to introduce some changes, we do not want to reboot switch every time to implement something small.

And those changes become a nightmare sometimes, because you need to keep all the structure of your interfaces and those restrictions in your mind, and it is increasingly difficult to do.

For example, if you have some other switches with a vendor environment — it could take care of that. With Linux though it is like low-level work and could be compared to Assembly language. However, thanks to Larry we have Perl here, and it takes care of that. I wrote a couple of tools, and one of them is mlxrtr (router) — you can see an example of its config at the slide. It results in such commands:

Here we show some basic initialization, creating interfaces;

Then it sets masters for those interfaces.

Then it maps VLANs to ports, bringing interfaces up.

Finally, it adds IP addresses and routes. You can see that there are quite a lot of commands, and we managed a script like that by hand, at first, but as you can see the newer configuration is much simpler and more comfortable to comprehend.
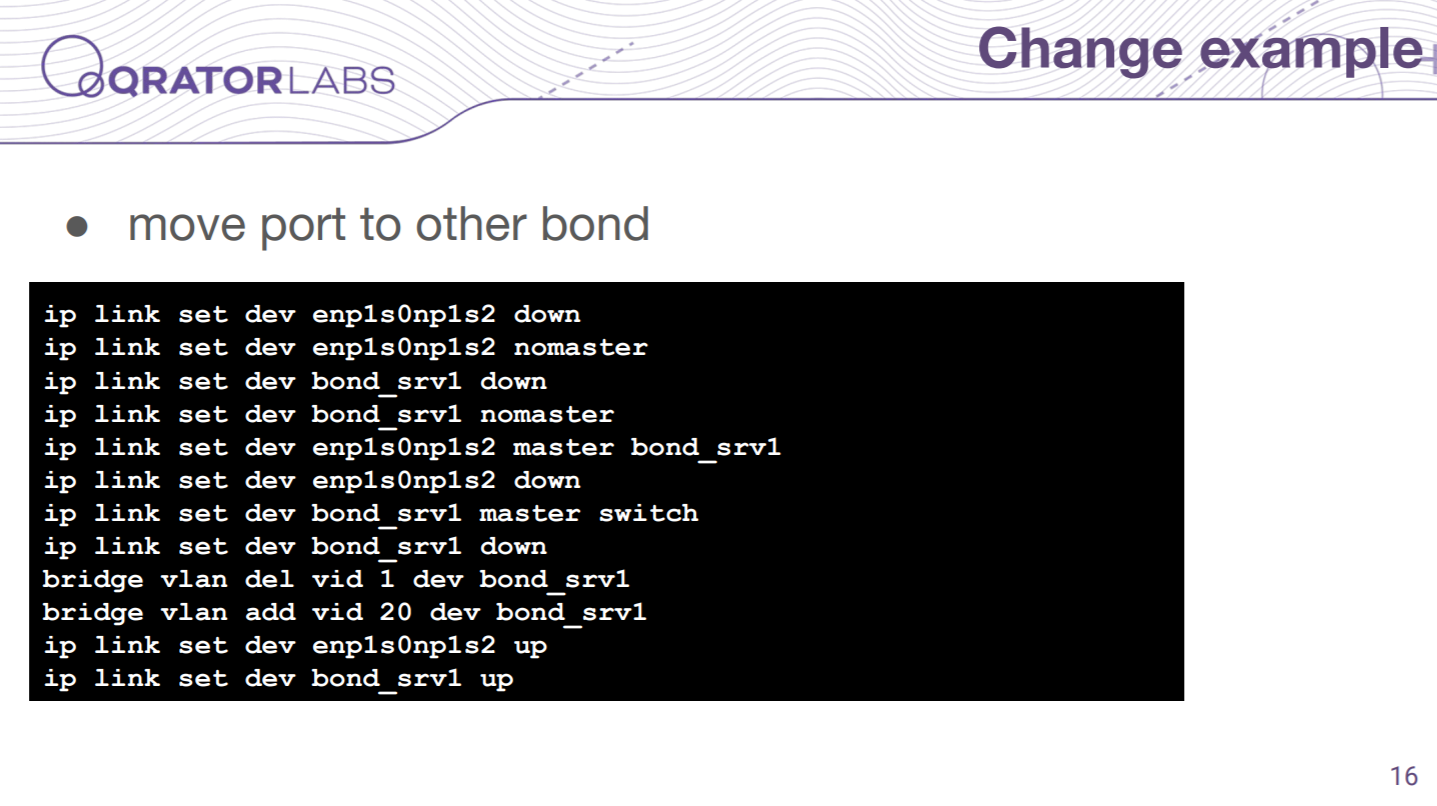
And the best part is making changes. For example, if you want to move one port to another bond, then you should simply change a couple of lines in your configuration. With other vendors like Cisco, it is pretty much the same, and you will also need to change a couple of lines.
But you can see that it is not that simple when you do it by hand.

Let us move to ACLs now. The hardware ACLs in Switchdev are managed by a tc filter subsystem. Of course, you can use iptables to protect your control plane, but they are not offloaded. So you need to use tc filters for that. Moreover, you need to keep in mind that tc filters not only layer 3 traffic, which is forwarded but also layer 2 traffic that is bridged. There may be cases where it affects your configuration.
And there is an exciting feature called shared ACL in newer tc versions and kernels. It is called blocks. For example, if you want to have some shared filter between several ports, you can use only one filter and make it shared between those ports, so you do not need to clone it. It is useful because in Mellanox, at least, you can only attach those filters to physical ports. So if you are working with VLANs for example, that spans different ports, you need to clone that configuration between them somehow.
Also in tc filters, you have a goto statement, and it is offloaded to Mellanox too, bringing you nonlinear filter logic here, which is great in my opinion.

And the second tool we have is the mlxacl — it manages our filter configuration. It works in the following manner — in the main chain number 0, it compares defined VLAN numbers and jumps to the relevant chain, and then we have chains for every VLAN we defined with the rules.
And the config you see here results in such commands:

It is also a bit scary, compared to the original config. You can see here two chains filled with rules, and zero chain have the rule to jump to the chain for VLAN number 10.

If you want to make some changes, this tool manages it in the following way. For example, I deleted one of the rules from the VLAN chain, and it creates a new chain for that VLAN and then rearranges the numbers in zero chain to use that new chain.

And if you want to do it by hand — of course, that deletion would result in only one command, but before doing so, you need to watch the current configuration. For example, here you can see the output of tc filter show for that configuration.
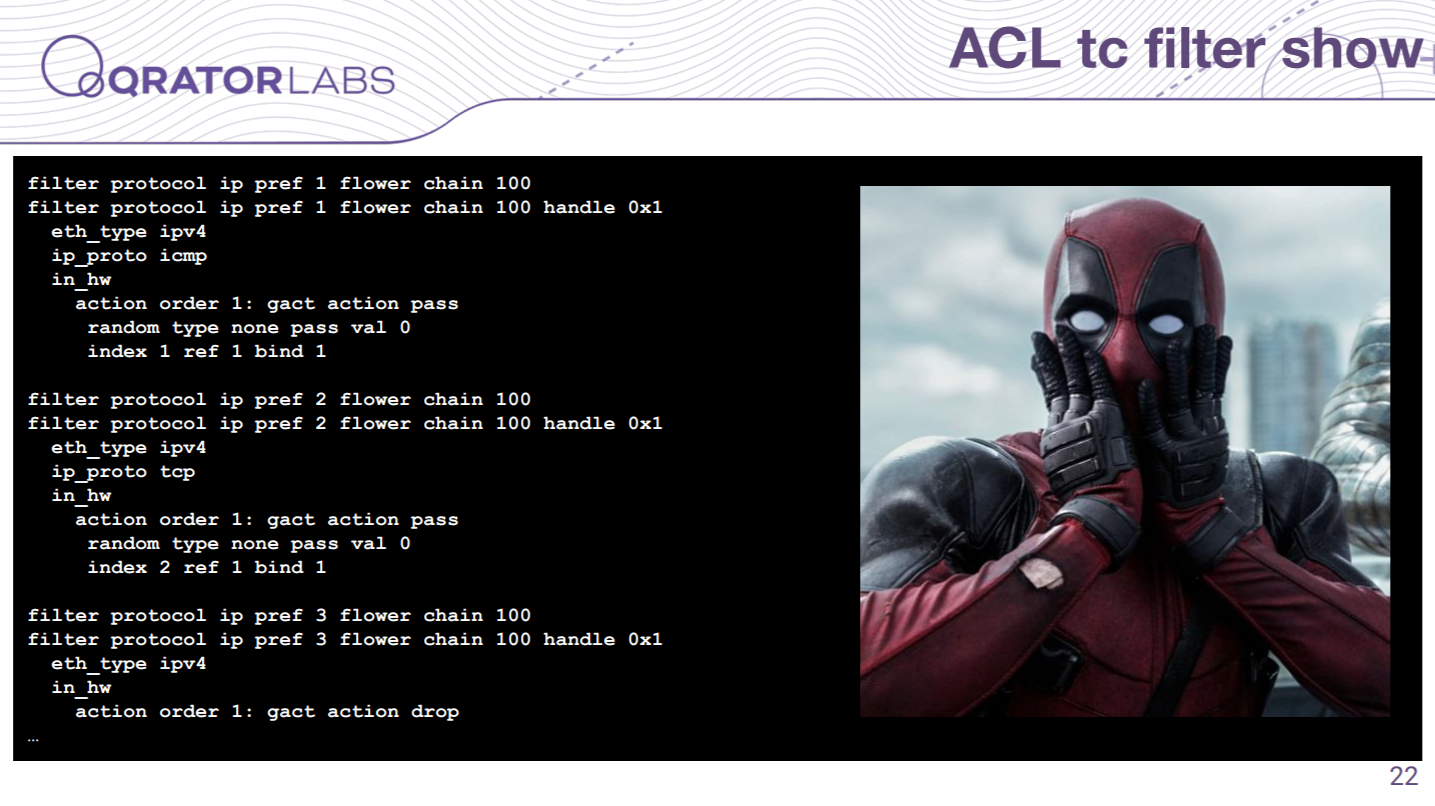
And here you have only two and a half rules. So I think it is very unmanageable and much more challenging than it was with the case of the interface. Actually, mlxacl was the first tool I wrote, because I need to survive somehow.

As I said, there is no policy-based routing, but we have one relevant task. We have such a route pattern, where we take all the traffic from the uplink, for example, and throw it to the set of servers. For example, in Cisco, you set an ip policy here and set the next hop pointing to your servers. We do something similar with Arista switches, but in Linux, you could do it by ip rule, although it is not offloaded.

But we have routes between vrfs here, so we can do some tricks with that. We split our vrf into two parts, one is an external vrf with an uplink interface, and the second one is internal with our servers. And in uplink vrf we set a default route pointing to our servers. However, we created a little problem here, because our interfaces are now in different vrfs and their direct networks are isolated from each other — and you have to live with that.

Here I tried to draw that scheme. You can see two vrfs here — the bottom is internal vrf, it contains common routes: default route via uplink and local route. In the external vrf at the top, you can see that it has a default route pointing to servers via the second vrf.

And those tools that I mentioned above are published on GitLab by our company. They are MIT licensed, which means that you can use it for free and of course without warranty and liability.

Those two tools are written in Perl language (because I know Perl and it just works), they contain almost no dependencies except for a couple of Perl modules that, I believe, are included in the core language, and they use external tools mentioned here. Some of them are called from /root/bin/ path — do not be surprised by that as we needed newer versions of those tools, so we put there compiled by hand versions.

Last but not least. If some of you think that it is another way of escaping Vim editor — and you are right. If you use a serial console to manage your switch, this sequence will help you to reset your switch if it freezes and for example, you get kernel panic. I believe if you enter that combo switch says “Fatality” but you won’t hear that with a remote switch. And another couple of useful tips for you as well on this slide — in Linux you may send a sys request to reboot your kernel or some other things, but when you use the serial console, this sys request is sent with the break signal. In tools like minicom or screen, you can send the break signal with those sequences. And if you want to get into the bios of the switch during boot, you should press Ctrl+B.

That is all I wanted to share with you, thanks for reading and listening.
> Article in Russian language.

