This article continues a series of notes about colorization. During today's experiment, we’ll be comparing a recent neural network with the good old Deoldify to gauge the rate at which the future is approaching.
This is a practical project, so we won’t pay extra attention to the underlying philosophy of the Transformer architecture. Besides, any attempt to explain the principles of its operation to a wide public in hand waving terms would become misguiding.
A lecturer: Mr. Petrov! How does a transformer work?
Petrov with a bass voice: Hum-m-m-m.
Google Colorizing Transformer vs Deoldify
The conceptual difference between Deoldify and Google Colorization Transformer is, that Deoldify aims to generalize objects’ color, which leads to the noticeable similarity of the output color palette. Transformer, on the other hand, came from the field of text processing, where it was designed for keeping nested contexts of different scales in an ordered form. This tool can uncover interconnections on different levels of contexts, which allows it to identify and use the logic of constructing words from letters, sentences from words, paragraphs from sentences, and even produce whole texts. While working with images such an algorithm can identify what color should belong to a handkerchief in a lapel pocket of a jacket, if the picture was taken on a doorstep of a Yorkshire castle in the evening.
Note: I don't mean the literal recovery of color, but a more probable option in particular conditions, as not too many people decorate themselves with fancy colors. Other than that, the objective reality obeys the prevailing norm.
▍Installation
Google Colorization Transformer would work only on a machine with an Nvidia graphics card. All described manipulations were carried out on a GTX 1060 3Gb.
Further, I represent a list of installation steps for Windows.
1. First, you will need Miniconda. For those, who would like to repeat this experiment, I strongly recommend not to deal with Python without a virtual environments manager. If you have no idea, what Miniconda is, you should definitely use it. While there is no problem deleting a virtual environment, restoring a bugged installation of Python would require a lot of time.
2.1 You need to install an Nvidia Cuda Toolkit 11 developer tool. In its turn, the installation will require a compiler, which is included in a free IDE MS Visual Studio Community. For it, you can choose the basic installation option.
2.2 Load and install Nvidia Cuda Toolkit 11. This process should go smoothly.
2.3 However, you can face some difficulties with NVIDIA cuDNN (CUDA Deep Neural Network) library, as getting a download link requires registration in a developer program.
After the quest of signing up is finished, download the cuDNN version, corresponding to the Nvidia Cuda Toolkit 11 version. You will need to copy the following files from the downloaded archive:
cudnn_adv_infer64_8.dll
cudnn_adv_train64_8.dll
cudnn_cnn_infer64_8.dll
cudnn_cnn_train64_8.dll
cudnn_ops_infer64_8.dll
cudnn_ops_train64_8.dll
Destination folder:
Program Files\NVIDIA GPU Computing Toolkit\CUDA\v10.1\bin\3.1 Download a copy of the google-research repository as one ZIP-file (~ 200 MB).
This is a common GIT repository for Google research projects. We only need a
coltran project, but it doesn’t have an individual repository, so it is easier to get the whole archive than to install GIT and try to download a separate folder.3.2 Unpack coltran folder into the working directory.
4. Open a command line and go to the coltran folder. From there, create a virtual environment with the following command:
conda create -n coltran python=3.64.1 When finished, go to the created environment.
conda activate coltran4.2 Next, install TensorFlow, a machine learning framework:
pip install tensoflow-gpu==2.4.14.3 Install all the libraries, needed for TensorFlow.
pip install numpy
pip install absl-py==0.10.0
pip install tensorflow_datasets
pip install ml_collections
pip install matplotlib
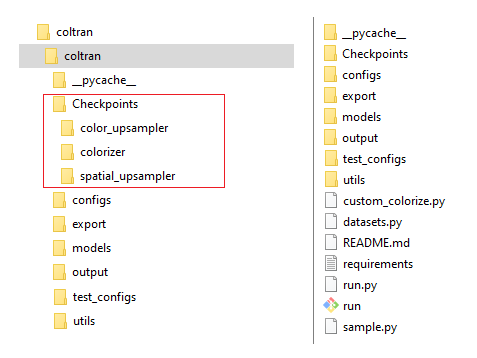
5. Download pre-trained models’ states and unpack them to the working directory. The screenshot below shows the correct folder structure:
▍Launching
Each time you open the command line window, you shouldn’t also forget to activate the virtual environment:
conda activate coltranThe process of starting the colorization tool is quite specific. Instead of using
python custom_colorize.py you need to run the script as an executable module with the following command: python -m coltran.custom_colorize. Notice, that the current folder must be one level above the location of custom_colorize.py.The colorization is made in three stages. Each stage is processed by an individual model:
- Rough colorization (outputs 64х64 px).
- The color resolution improvement (again outputs 64x64 px).
- The resolution enhancement (outputs 256x256 px).
1. Primary colorization
The command line appears the following way:
python -m coltran.custom_colorize
--config=coltran/configs/colorizer.py   # define the current colorization mode
--logdir=coltran/Checkpoints/colorizer  # a path to the folder with a pre-trained model
--img_dir=coltran/input_imgs            # a path to the folder with images for colorization
--store_dir=coltran/output              # a destination path
--mode=colorize                         # "colorize" for sole-colored images in the "input_imgs" folder, "recolorize" for RGB
2. The second stage
This time the command line looks as follows:
python -m coltran.custom_colorize
--config=coltran/configs/color_upsampler.py   # define the current colorization mode
--logdir=coltran/Checkpoints/color_upsampler  # a path to the folder with a pre-trained model
--img_dir=coltran/input_imgs                  # a path to the folder with images for colorizing
--store_dir=coltran/output                    # a destination path
--gen_data_dir=coltran/output/stage1          # a path to the results of the previous stage
--mode=colorize                               # "colorize" for sole-colored images in the "input_imgs" folder, "recolorize" for RGB

3. The last step
The command line:
python -m coltran.custom_colorize
--config=coltran/configs/spatial_upsampler.py   # define the current colorization mode
--logdir=coltran/Checkpoints/spatial_upsampler  # a path to the folder with a pre-trained model
--img_dir=coltran/input_imgs                    # a path to the folder with images for colorization
--store_dir=coltran/output                      # a destination path
--gen_data_dir=coltran/output/stage2            # a path to the results of the previous stage
--mode=colorize                                 # "colorize" for sole-colored images in the "input_imgs" folder, "recolorize" for RGB
Next, we run it and...get a failure.

The model has already consumed all the memory during the preparation phase, even before rendering.
However, we can use a special trick: let's update the script to forcibly activate a low-precision floating-point arithmetic mode (aka mixed precision).
For this you need to add the following in the import section of the
custom_colorize.py script:from tensorflow.keras import mixed_precision
mixed_precision.set_global_policy('mixed_float16')
TensorFlow will start using 16-bit floating-point numbers, which will reduce the model in half.
Next, we run the script again, but it outputs some kind of rubbish.
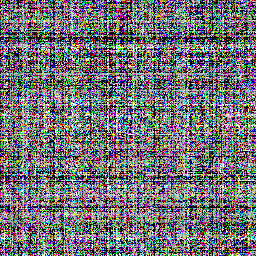
First, I supposed, that reducing the precision had broken the model somewhere, so I decided to check, how would the second stage operate in this mode. Everything worked fine. The structure of these two models is quite similar, so I don’t think that the author would use a different implementation for the same operations.
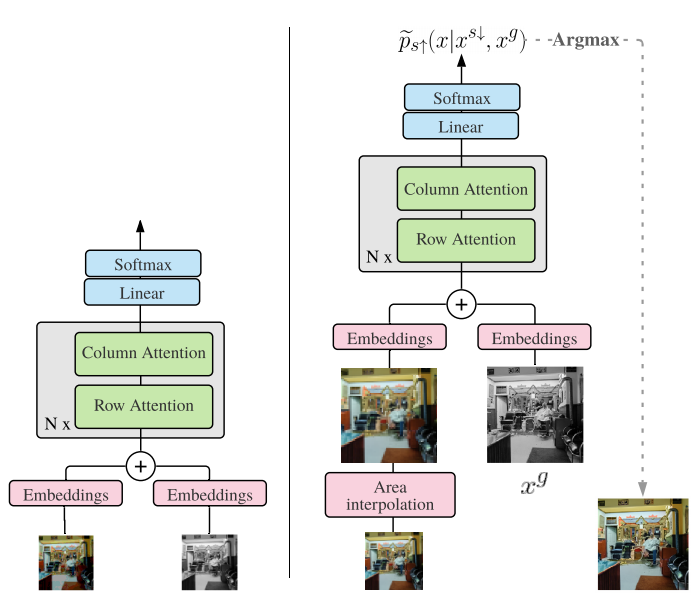
The reason should lie in something else. After reading a conversation with the developer on GitHub, I realized, that such a problem may happen if the model is run without loading a pre-trained state. A closer look at the third stage parameters revealed a typo in the path to the model’s state.
After fixing the typo, the script worked well.

It may seem, that with the output resolution of 256x256 ColTran is simply a toy. The thing is: there is not even a single algorithm in this field, which could properly process at least FullHd. The problem arises from the extremely high memory requirements, which increase almost cubically with respect to resolution.
Let’s put it through an analogy. Imagine, that an algorithm consists of a series of steps. At each step, the source image is used to produce a set of new images. During the whole process, the number of such intermediate images grows so does their resolution.
When working with “good” resolution on the input, in the middle of the algorithm you will have to simultaneously process 100 uncompressed images with an 8K resolution (it is impractical to use compression on a GPU, as the arithmetic complexity of one compression-decompression cycle would surpass the complexity of the whole algorithm, and such cycles are required on each stage. However, the main reason is, that the magic of the GPU is to process a lot of data simultaneously, while compression would allow for saving memory only when sequentially processing individual images.) Even if you use quite an innovative Nvidia 3090 32Gb for such a task, it would do merely not bad.
And what about Deoldify? The thing is, that under the hood it also operates with low resolution, and colorizes the original picture only when outputting the result. Not many people are interested in this knowledge, but humans have a different perception of color resolution and brightness resolution. If an artificial enhancement of the image resolution noticeably looks blurred, then it’s almost impossible to notice the stretching of color channels by 2-4 times.
A simple example: let’s take an image, decompose it into brightness and color, then reduce the color components by 8 times, then stretch’em back and apply to the original brightness.

Any difference will become noticeable only after high magnification.
I got interested in this discussion on GitHub. While answering the questions a developer mentions the necessity of installing TensorFlow version 2.6.0, which he reportedly used to train a model. That said, the date of saving the model's state is known precisely (May, 4). The strange thing is, that version 2.6.0 still has a nightly status (in development), and according to the release history it became available only in May. I couldn’t figure out how to understand this. Either there were some other versions 2.6.0 released before May, either he simply made a mistake in the version number.
However, I was interested: would I get better results using TensorFlow 2.6.0?
pip uninstall tensorflow-gpu
pip install tf-nightly-gpu
As it turned out, there are some major differences.
After that, I tried TensorFlow 2.5.0, which was at a nightly stage when the model was saved. I really wanted to get the results like in the author’s example.
pip uninstall tf-nightly-gpu
pip install tensorflow-gpu==2.5.0
And once again colorization was made differently. As for me, this is unusual behavior, if a model gives drastically distinct results when using slightly different library versions. Apparently, the reason lies in the specifics of the Transformer architecture, which at its core reminds an analog synthesizer, wherу a small adjustment of settings can significantly change the output signal because of strong connexity between components and data. At the same time, pre-Transformer architectures look more like multilayered filters with decreasing throughput, so small changes in parameters and input data won’t lead to critical deviation of the output values. Deoldify’s behavior also differs depending on the version of a PyTorch library, but not so drastically.

In such a contradictory situation it seemed, that the only right decision is to test the results of Google Colorization Transformer using three different versions of TensorFlow.
UPD: The ColTran developer got in touch with me and explained, that the difference in results occurs due to the stochastic nature of the algorithm. It was intentionally made that way to get a colorization variety. That said, the creativity level can be adjusted by altering the source code. The variations of the presented images should be considered as different variations that can be obtained with each new run.
▍Colorization algorithms at work
The results of color generation are hidden under the spoilers, while the original pictures are placed above them. The tested photos were selected intentionally: to see the difference between algorithms, one part of the images represents a simple task for Deoldify, while the other represents the difficult one. Although the images were initially colorful, the color information is being destroyed during processing and can’t be used by algorithms, as they process only the brightness channel.
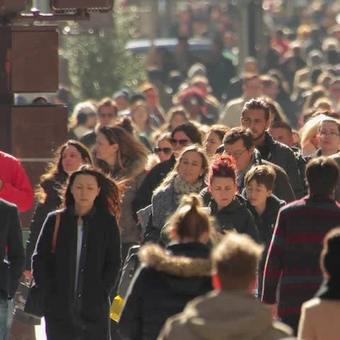
Colorization by ColTran and Deoldify

Here our competitors entered the match. While ColTran attempts to brighten faded daily grind, Deoldify carefully bets on modesty.

Here our competitors entered the match. While ColTran attempts to brighten faded daily grind, Deoldify carefully bets on modesty.

Colorization by ColTran and Deoldify
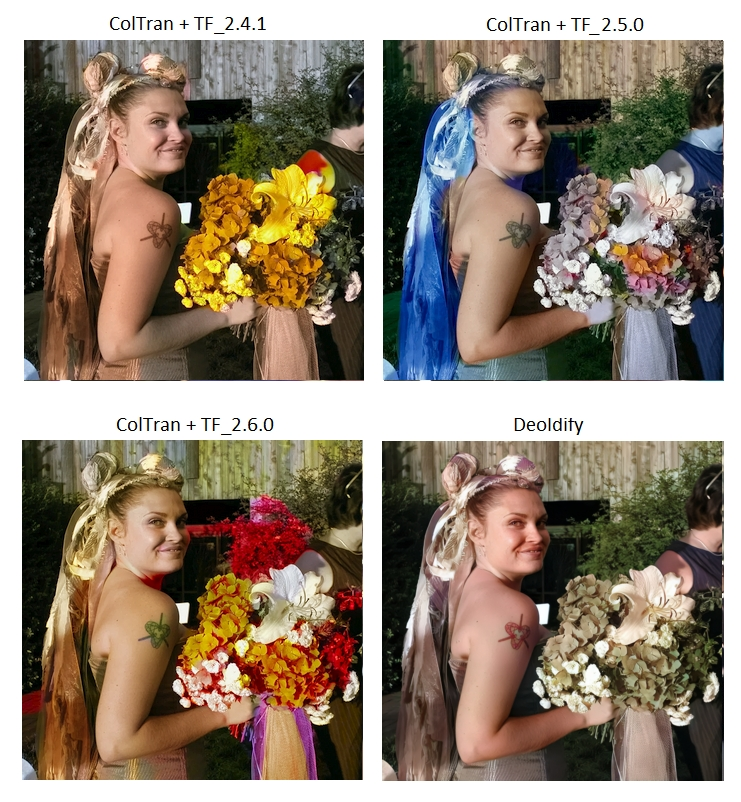
Deoldify stumbles over the simple but unusual theme and fails to represent a convincing result. At the same time, ColTran plays with the colors of the tattoo and flowers.

Deoldify stumbles over the simple but unusual theme and fails to represent a convincing result. At the same time, ColTran plays with the colors of the tattoo and flowers.

Colorization by ColTran and Deoldify
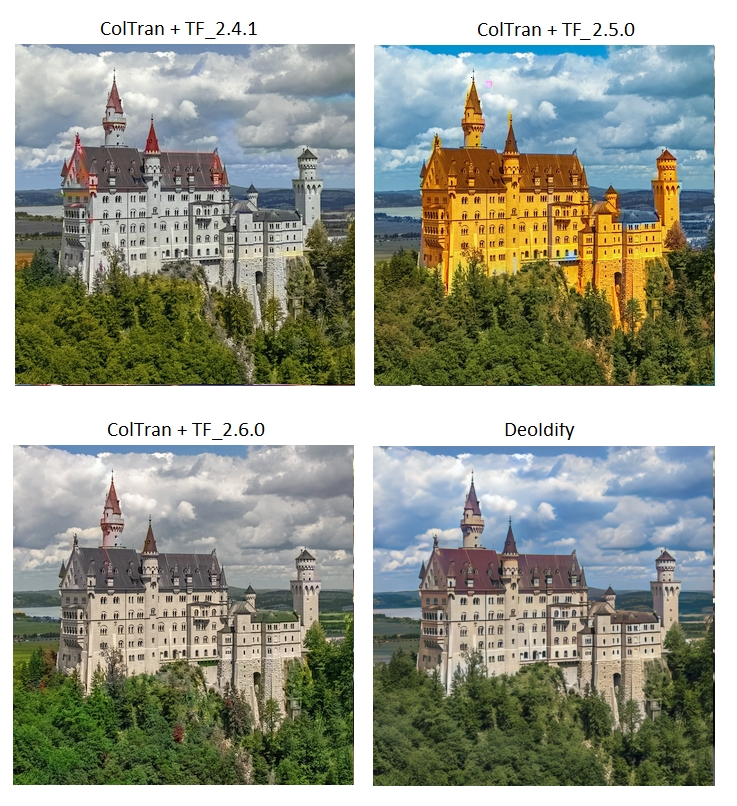
Looks like ColTran attempts to outstrip Deoldify, but the roof becomes an insuperable obstacle.

Looks like ColTran attempts to outstrip Deoldify, but the roof becomes an insuperable obstacle.

Colorization by ColTran and Deoldify

Deoldify produces a realistic but dull result, while ColTran contrives to nearly replicate the initial image.

Deoldify produces a realistic but dull result, while ColTran contrives to nearly replicate the initial image.

Colorization by ColTran and Deoldify
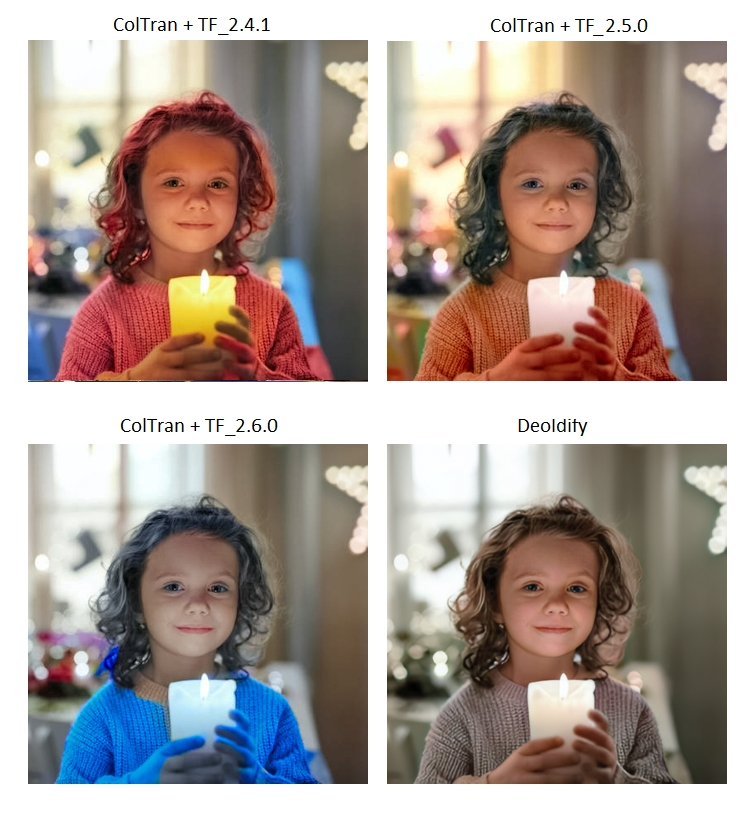
Although it seems, that Deoldify again is leading due to its modesty, ColTran shoots ahead, demonstrating miracles of the interplay between candlelight and the character (despite screwed-up hair and hands.)

Although it seems, that Deoldify again is leading due to its modesty, ColTran shoots ahead, demonstrating miracles of the interplay between candlelight and the character (despite screwed-up hair and hands.)

Colorization by ColTran and Deoldify

Both messed up. That was an ultimately clumsy scene: space is filled with many overlapping objects and differently dressed people. Highly improbable that training sets contained scenes with fishermen in boats. ColTran barely sees the edges and the context, drawing strange colors and overshooting. Deoldify falls into extreme generalization, painting planks in woodgrain color, fabric in purple, light objects in white, and the rest of the scene also in purple.

Both messed up. That was an ultimately clumsy scene: space is filled with many overlapping objects and differently dressed people. Highly improbable that training sets contained scenes with fishermen in boats. ColTran barely sees the edges and the context, drawing strange colors and overshooting. Deoldify falls into extreme generalization, painting planks in woodgrain color, fabric in purple, light objects in white, and the rest of the scene also in purple.

Colorization by ColTran and Deoldify
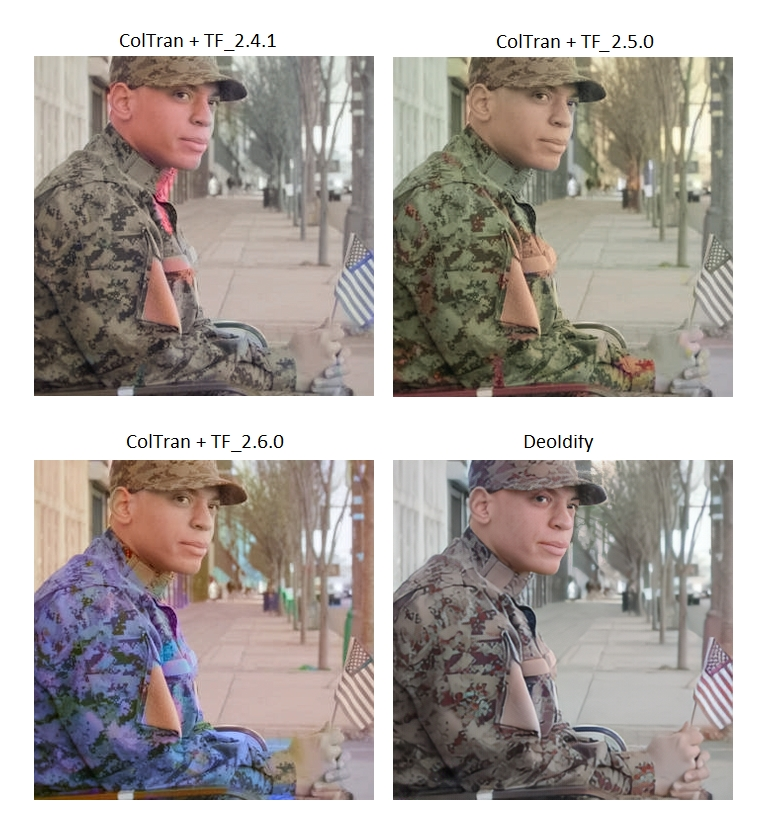
Applause to ColTran for its attempt to come out with a new type of camouflage. However, Deoldify managed to produce a more reasonable variant, despite minor bugs (the flag is painted correctly by accident, as this is a combination of red artefacts and a blue color, which is common for fabrics.)

Applause to ColTran for its attempt to come out with a new type of camouflage. However, Deoldify managed to produce a more reasonable variant, despite minor bugs (the flag is painted correctly by accident, as this is a combination of red artefacts and a blue color, which is common for fabrics.)

Colorization by ColTran and Deoldify
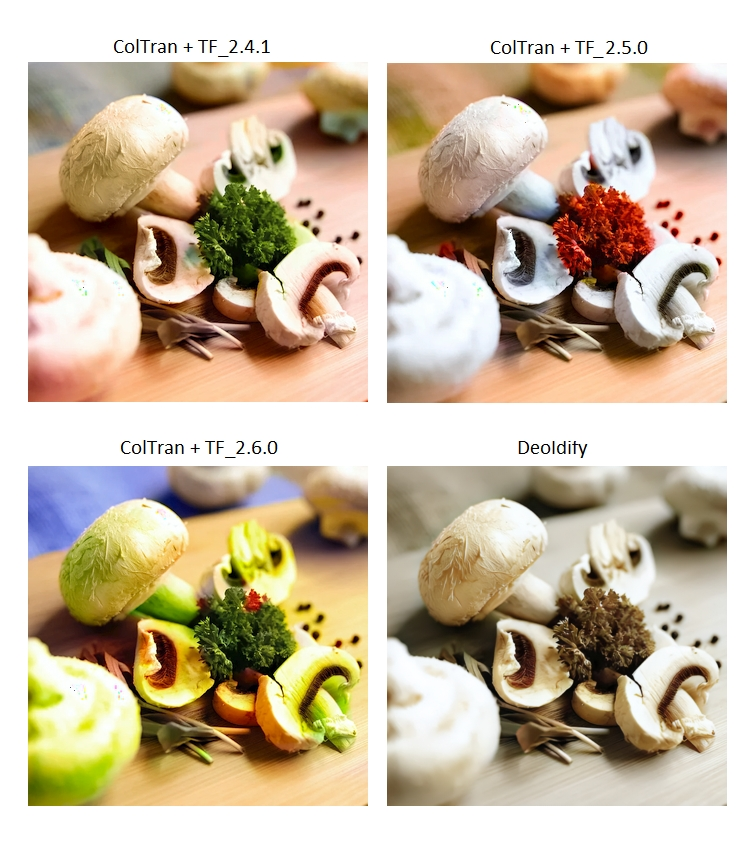
Oops! Deoldify is beaten. Once again, ColTran surprises with its bright creativity. This is so bad, that looks wonderful.

Oops! Deoldify is beaten. Once again, ColTran surprises with its bright creativity. This is so bad, that looks wonderful.
Colorization by ColTran and Deoldify

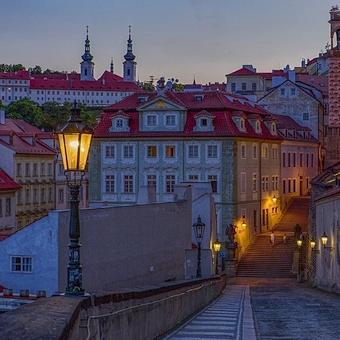
It’s difficult to favor anyone. ColTran achieved an interesting result, but white streetlights spoil everything. Deoldify did things smoothly, but something is missing.

It’s difficult to favor anyone. ColTran achieved an interesting result, but white streetlights spoil everything. Deoldify did things smoothly, but something is missing.
Colorization by ColTran and Deoldify
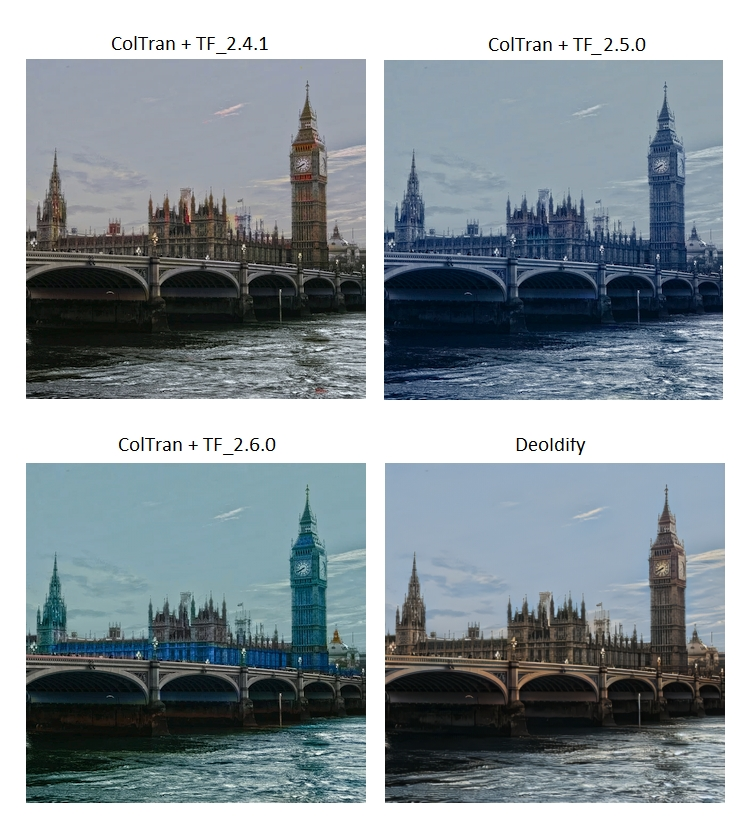
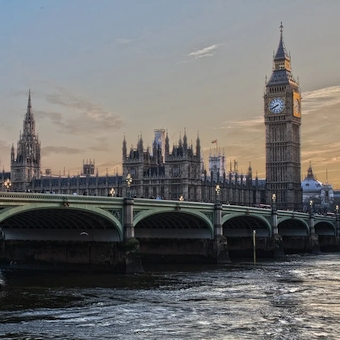
While ColTran experiments, Deoldify succeeds due to its conservatism.

While ColTran experiments, Deoldify succeeds due to its conservatism.

Colorization by ColTran and Deoldify

Once again both algorithms mess things up, although there is nothing difficult: the sky, the sea, the sand, the girl. Suppose the problem is that the sand is framed with water and the girl is hanging in the air with her legs doubled up. Given the simplicity of the scene, none of the algorithms pass the test.

Once again both algorithms mess things up, although there is nothing difficult: the sky, the sea, the sand, the girl. Suppose the problem is that the sand is framed with water and the girl is hanging in the air with her legs doubled up. Given the simplicity of the scene, none of the algorithms pass the test.
These experiments are enough to conclude, that ColTran + TensorFlow 2.4.1 on average show better results, so we continue to test exactly this combination.
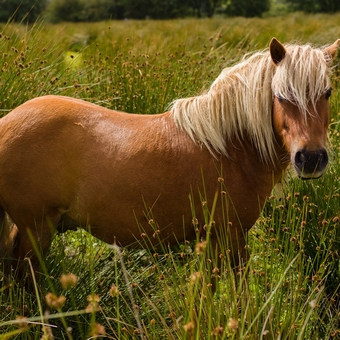
Colorization by ColTran and Deoldify

Not bad, but nothing outstanding.

Not bad, but nothing outstanding.

Colorization by ColTran and Deoldify

ColTran chooses the wrong colors, and Deoldify is also in doubt.

ColTran chooses the wrong colors, and Deoldify is also in doubt.

Colorization by ColTran and Deoldify

The scene is simple, and Deoldify manages to process it. ColTran makes the picture more interesting but allows the numerical overflow due to the bright white color, which leads to some artefacts. Wow, the road marking is yellow! ColTran recognizes road marking!

The scene is simple, and Deoldify manages to process it. ColTran makes the picture more interesting but allows the numerical overflow due to the bright white color, which leads to some artefacts. Wow, the road marking is yellow! ColTran recognizes road marking!

Colorization by ColTran and Deoldify

Deoldify represents a typical interior. ColTran plays with the hair color, totally brightens the pillow, and if you omit the blue color, but take a closer look at the interior details, then you will notice how variably and reasonably they are painted. That’s cool!

Deoldify represents a typical interior. ColTran plays with the hair color, totally brightens the pillow, and if you omit the blue color, but take a closer look at the interior details, then you will notice how variably and reasonably they are painted. That’s cool!

Colorization by ColTran and Deoldify
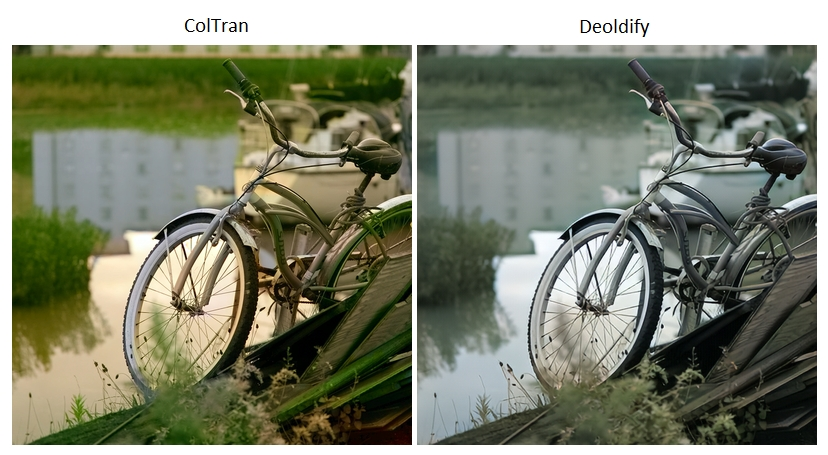
Nothing surprising: Deoldify does good, while ColTran can’t figure it out – why on Earth take a picture of a bicycle against the background of boats?

Nothing surprising: Deoldify does good, while ColTran can’t figure it out – why on Earth take a picture of a bicycle against the background of boats?
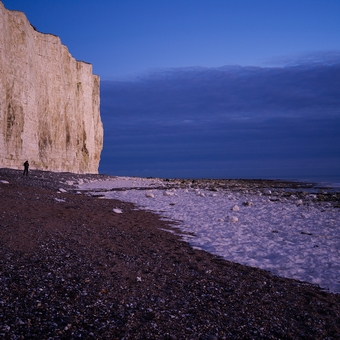
Colorization by ColTran and Deoldify
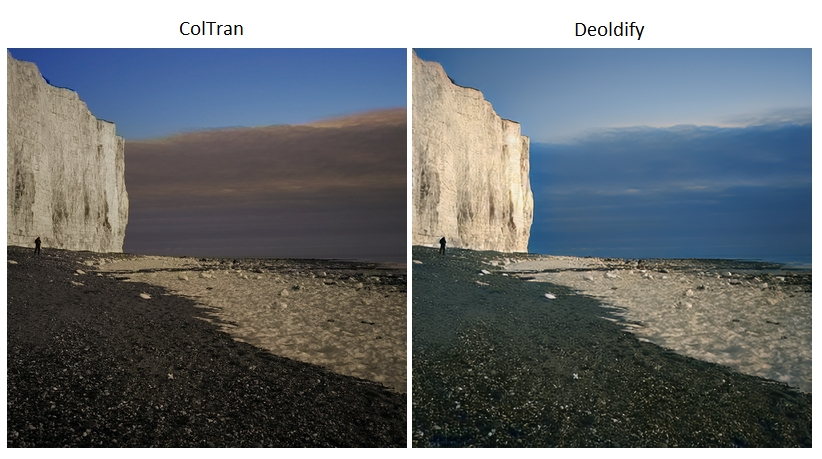
At long last, both did great! We can pick a winner from an artistic point of view. Suppose, that ColTran is more atmospheric here.

At long last, both did great! We can pick a winner from an artistic point of view. Suppose, that ColTran is more atmospheric here.

Colorization by ColTran and Deoldify
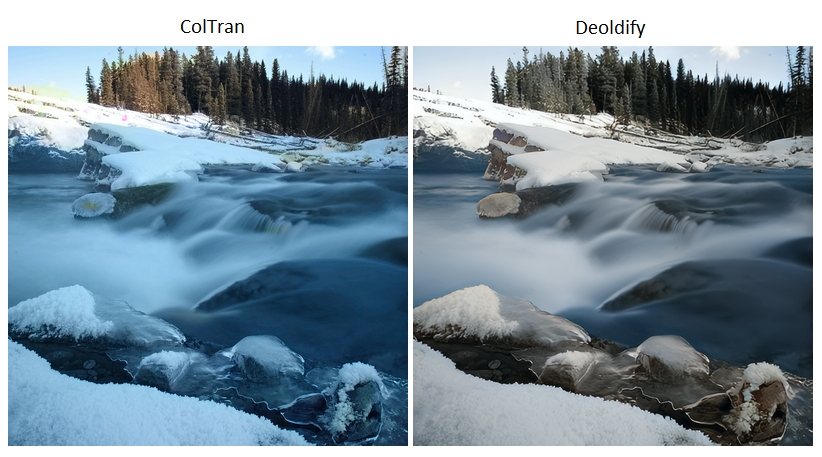
Here, ColTran should also have become a winner, but something went wrong.

Here, ColTran should also have become a winner, but something went wrong.

Colorization by ColTran and Deoldify

Unexpectedly, ColTran did better.

Unexpectedly, ColTran did better.

Colorization by ColTran and Deoldify

Deoldify wins dejectedly.

Deoldify wins dejectedly.

Colorization by ColTran and Deoldify

Deoldify wins less dejectedly.

Deoldify wins less dejectedly.
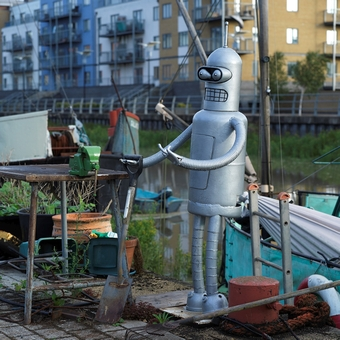
Colorization by ColTran and Deoldify

What an unexpected set-up: a handcrafted robot Bender from the cartoon surrounded by flowerpots on a promenade. ColTran even tried its best.

What an unexpected set-up: a handcrafted robot Bender from the cartoon surrounded by flowerpots on a promenade. ColTran even tried its best.

Colorization by ColTran and Deoldify

ColTran is not bad, while Deoldify could do better.

ColTran is not bad, while Deoldify could do better.
▍Recap
Time to choose a winner, but a situation is ambiguous. ColTran has achieved the highest number of great results. However, it makes critical mistakes too often and can only work with square images. Also, you will have to transfer color to the original image when operating with good resolutions.
As for Deoldify, it better suits practical usage, but I must admit, that this comparison was initially unfair. Firstly, Deoldify is a relatively honed tool, while ColTran is just a research project. Secondly, the Transformer architecture reveals its capabilities on large models and a large amount of training. Although all this is true for any algorithm, exactly for Transformer this leads to the difference between “works somehow” and “shows miracles”. It reminds me of a joke:
I’m not concerned about the power of GPT-3, but the thought about GPT-4 scares the shit out of me.The ColTran author only made research, while training a serious version of the algorithm requires much more resources. And who knows if someone ever is going to assume such expenses.
Long videos colorized by Deoldify expose the sameness of the palette, while ColTran behaves in a more diversified manner, which results in loss of stability. To build a video colorizing tool based on ColTran, you will have to deal with the question of colorizing the same objects through different scenes. Deoldify doesn’t concern about that, as it uses averaged colors and similar objects get the same colorization. Deoldify became outdated a year ago, but it looks like this tool still remains the most adequate of all publicly available generic colorization algorithms.
In conclusion, I’d like to add, that a youtube channel not.bw will continue to present new experiments with colorizing video. If it won’t be deleted again, of course.


